A Guide to Snowpipe Snowflake for Data Ingestion
Discover how to use Snowpipe Snowflake for real-time data ingestion. This guide covers architecture, use cases, and best practices to maximize efficiency.
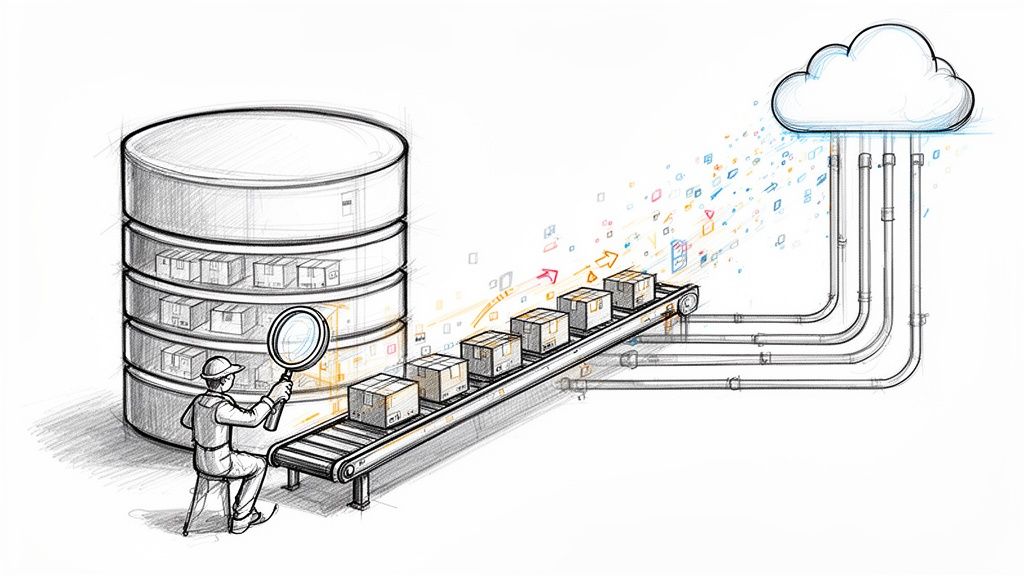
Think of Snowpipe as the dedicated, always-on conveyor belt for your data. It automatically loads new information into your Snowflake tables the instant it shows up in your cloud storage. No more waiting around for scheduled batch jobs to run.
What Is Snowpipe and Why Does It Matter?
Traditional data loading is a lot like waiting for scheduled truck deliveries. You collect data over a set period—maybe an hour, maybe a whole day—and then load it all in one big batch. This works, but it creates a lag between when data is created and when you can actually use it for analysis. In a world where quick insights give you a real edge, that delay can mean lost opportunities.
Snowpipe flips this entire model on its head. It's completely event-driven, which means it doesn't need manual scripts or scheduled tasks. Instead, it actively listens for file arrival notifications from your cloud storage—whether that's Amazon S3, Google Cloud Storage, or Microsoft Azure Blob Storage. The moment a new file lands, Snowpipe kicks into gear and starts loading it.
This diagram perfectly illustrates how data just flows from your storage right into Snowflake without anyone needing to lift a finger.
The magic here is the seamless automation. Data streams in continuously, making it ready for querying almost immediately.
The Shift from Batch to Real-Time Ingestion
Moving from periodic batches to continuous, near real-time ingestion is a huge deal. It’s not just a technical tweak; it's a fundamental change in how a business can operate. Snowpipe is at the heart of this shift, automating the whole process and slashing the latency that’s so common with older methods. You can find more great insights about real-time loading over at snowflakemasters.in.
By eliminating the "wait time" for data, Snowpipe empowers organizations to act on fresh information immediately. This is critical for time-sensitive operations that depend on the most current data available.
To better understand this evolution, let's compare the two approaches side-by-side.
Continuous Ingestion vs Traditional Batch Loading
FeatureSnowpipe (Continuous Ingestion)Traditional Batch LoadingData LatencyMinutes (near real-time)Hours or even daysProcess TriggerEvent-driven (file arrival)Fixed schedule (e.g., every 24 hours)ScalabilityAutomatically scales with loadRequires manual capacity planningManagementFully managed by SnowflakeRequires scripting and job orchestrationCost ModelPay-per-use (compute-seconds)Billed for warehouse uptime during loadIdeal Use CaseTime-sensitive analytics, IoT, logsEnd-of-day reporting, historical analysis
This table makes it clear: Snowpipe is built for the speed and agility that modern businesses demand, while traditional methods are better suited for less time-sensitive tasks.
Why This Matters for Your Business
Having access to fresh data isn't just a nice-to-have; it unlocks powerful capabilities that were once completely out of reach.
Here are a few real-world examples:
- Fraud Detection: Financial companies can analyze transaction data as it happens, stopping fraud in seconds instead of hours later.
- Inventory Management: A retailer gets live updates on stock levels with every sale, allowing for instant reordering and preventing empty shelves.
- Customer Personalization: An e-commerce site ingests clickstream data in real time to immediately adjust a user's experience and recommend relevant products.
- Log Analytics: DevOps teams can monitor application logs as they’re generated, letting them spot and fix system errors or security threats right away.
At the end of the day, using a Snowpipe Snowflake pipeline means your dashboards and analytics show you what's happening right now, not what happened yesterday.
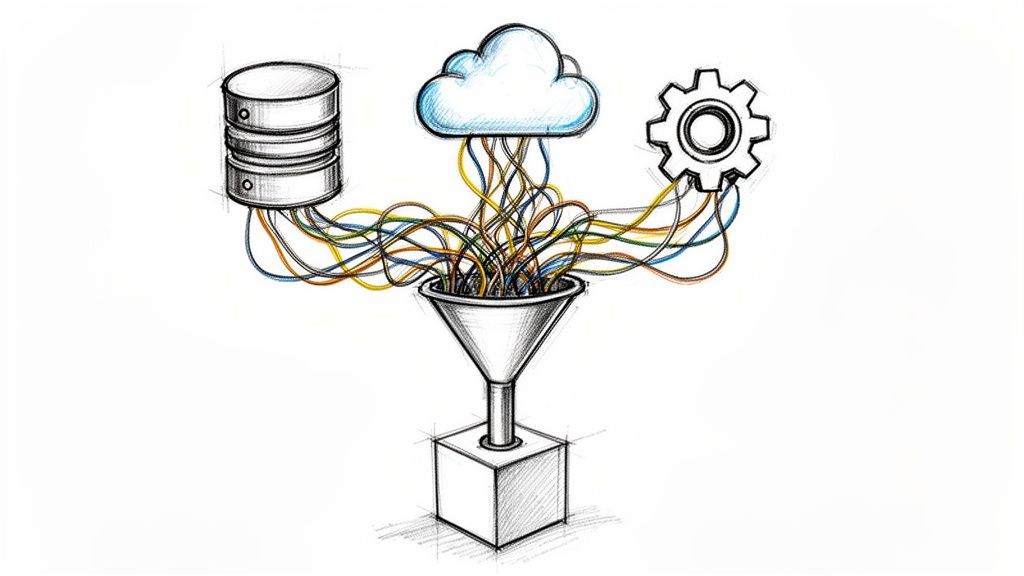
A Look Under the Hood: The Snowpipe Architecture
To really get what Snowpipe is all about, you have to look at its architecture. It’s not just one thing; it's a smart, coordinated system built to get your data into Snowflake as fast and efficiently as possible. Think of it less like a tool and more like an automated assembly line.
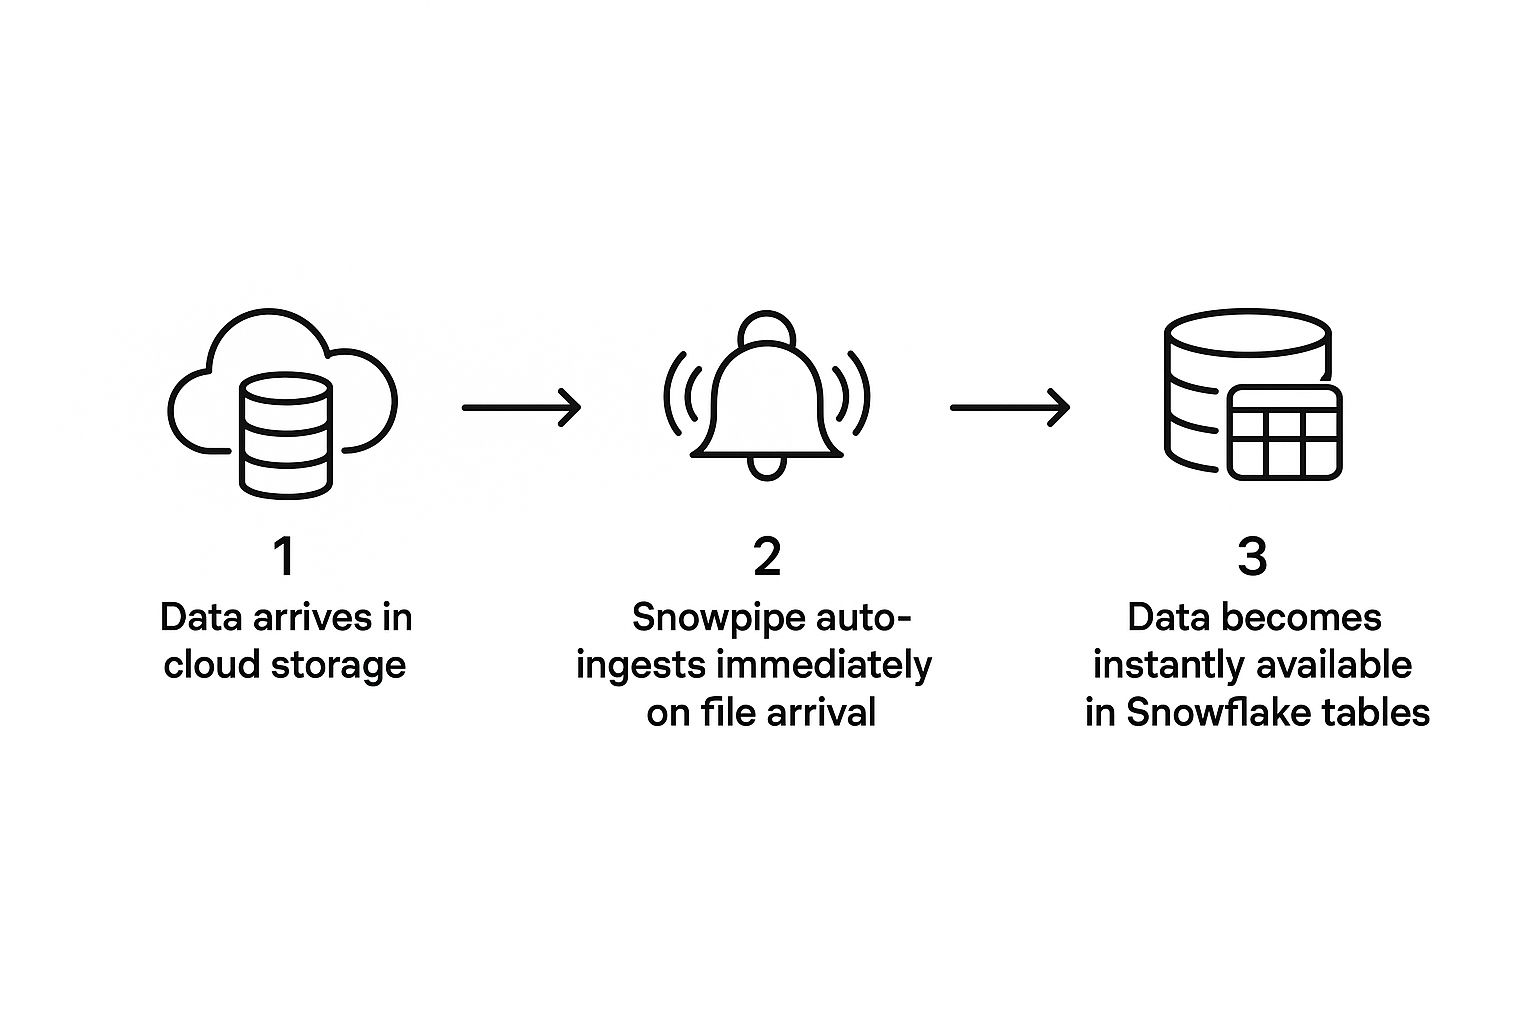
The process starts with your external cloud storage—this is your staging area. It could be an Amazon S3 bucket, a Google Cloud Storage container, or an Azure Blob Storage container. This is where your new data files, like application logs or transaction records, first land.
From there, the real magic kicks in. Snowpipe doesn’t waste time constantly checking your storage buckets for new files. Instead, it waits for a signal from the cloud provider itself.
The Role of Event Notifications
As soon as a new file arrives in your designated storage location, the cloud provider (AWS, GCP, or Azure) fires off an event notification. This message is the trigger, a simple tap on the shoulder for Snowpipe that says, "Hey, a new file just showed up. Time to get to work."
This event-driven approach is miles more efficient than old-school scheduled checks. It means data loading starts the moment data is available, cutting down on latency and saving compute resources. The notification gets sent to an internal queue managed by Snowflake, which lines up the incoming files to be processed.
Snowpipe’s secret sauce is its serverless design. It doesn't use your virtual warehouses for the ingestion work. Instead, it runs on a completely separate, Snowflake-managed compute cluster built just for loading data.
This separation is a massive win. It means your data ingestion never gets in the way of your analytics queries. Your dashboards and reports stay snappy and responsive, even when you're loading huge amounts of data. It’s also incredibly cost-effective because you only pay for the exact compute time used to load each file, right down to the second.
Choosing Your Ingestion Method
Snowpipe gives you two main ways to load data, and each one is suited for different situations. Getting the difference is key to building the right data pipeline. The most common method is Auto-Ingest, which relies on those cloud event notifications we just talked about.
The other option is to call the Snowpipe REST API directly. This gives you more hands-on control, letting you kick off data loads programmatically from your own applications or scripts.
FeatureAuto-IngestREST APITrigger MechanismCloud storage event notifications (e.g., S3 Event Notifications)Direct API calls from a client applicationSetup ComplexityRequires configuring event notifications in your cloud providerRequires custom code to make API callsBest ForContinuous, hands-off data ingestion from cloud storageIntegrating data loading directly into custom applicationsExample Use CaseStreaming IoT sensor data that is constantly being written to S3An internal app that needs to load a specific report on demand
For most continuous data pipelines, Auto-Ingest is the way to go. It's a true "set it and forget it" solution. While both methods are great, a newer evolution called Snowpipe Streaming offers even lower latency for ingesting data row-by-row, skipping the need for files altogether. To see how that works, you can learn more about Snowpipe Streaming in our detailed guide.
How Snowpipe Prevents Duplicate Data Loads
One of the biggest headaches with automated pipelines is accidentally loading the same file twice. Thankfully, Snowpipe has this covered.
For every pipe you create, Snowflake keeps a metadata log of every single file that has been loaded. This log tracks file names and their unique versions or checksums. Before loading a new file, Snowpipe quickly checks this log.
If it sees the file has already been processed, it just skips it. Simple as that. This guarantees exactly-once loading for every file, ensuring your data stays clean and accurate without forcing you to write complicated deduplication logic. It's a small but vital feature that makes the whole system so reliable.
The Features That Make a Real Business Difference
It's one thing to talk about architecture, but the real magic of a Snowpipe Snowflake pipeline is what it does for your business. These aren't just technical bells and whistles; they’re features designed from the ground up to make your data operations cheaper, faster, and far more reliable. Let’s break down how Snowpipe turns technical capabilities into tangible business value.

The biggest game-changer is that Snowpipe is completely serverless. It runs on a separate, Snowflake-managed compute resource, which means it never fights for resources with your analytical queries. Your data teams can finally stop babysitting virtual warehouses just to get new data into the system.
This hands-off approach frees up a ton of engineering time. Instead of wrestling with infrastructure, your team can focus on what they do best: building data products that drive the business forward.
Serverless by Design, Zero Management Required
Imagine a data loading process that just works. No manual triggers, no scripts to monitor, no warehouses to resize. That's exactly what Snowpipe's serverless model delivers. Because Snowflake takes care of all the underlying compute, you get a system that’s incredibly powerful yet surprisingly simple to manage.
Here’s why that matters so much:
- No Warehouse Contention: Your ingestion jobs are totally isolated from your analytics. BI dashboards stay snappy and user queries run fast, even when you're loading massive amounts of data.
- A Lighter Operational Load: Your team is officially out of the business of monitoring warehouse loads or fiddling with suspend/resume schedules for ingestion. Snowflake handles it all behind the scenes.
- Focus on High-Impact Work: By abstracting away the infrastructure headache, Snowpipe lets your engineers put their energy into designing better data models and solving real business problems.
This serverless foundation is what makes Snowpipe so efficient, leading directly to lower costs and a more productive team.
Cost-Effective, Per-Second Billing
With Snowpipe, you only pay for the exact compute time you use to load data—billed right down to the second. This is a world away from traditional methods where you might have to keep a virtual warehouse running for an hour just to handle a few minutes of work.
This granular, pay-as-you-go model is a game-changer for TCO (Total Cost of Ownership). You're no longer bleeding money on idle resources. Every penny you spend on ingestion is directly tied to work getting done.
This precise billing means you’re not over-provisioning or wasting budget, which makes your data pipelines significantly more economical. It’s the smart way to manage costs, especially when your data arrives in unpredictable bursts.
Automatic Scaling and Built-In Resilience
Data flow is rarely a straight line. One minute it’s a trickle, the next it’s a flood from a new marketing campaign or a spike in IoT sensor data. Snowpipe is built for this chaos. It handles volatility with automatic and seamless scaling. As volume ramps up, Snowflake quietly adds more resources to keep pace and then scales them back down when things quiet down.
This elasticity means your pipeline won't buckle under pressure. Better yet, Snowpipe is designed for fault tolerance. A transient error won't bring everything to a grinding halt. It intelligently retries and provides clear error reporting, giving you a data loading process that's both dependable and resilient.
This kind of reliability is absolutely critical for modern data applications. Snowpipe is the engine that feeds the AI and analytics workloads running on Snowflake’s AI Data Cloud platform. Snowflake has an ambitious roadmap with 125 product innovations aimed at making the platform AI-ready, and Snowpipe's real-time capability is essential for feeding AI models the fresh data they need. You can dive deeper into Snowflake's AI-focused innovations and see how they are shaping the industry.
Practical Use Cases for Snowpipe Ingestion
It's one thing to talk about the theory behind Snowpipe, but it’s another thing entirely to see it in action. When you see how a Snowpipe Snowflake pipeline solves real business problems, its value really sinks in. This kind of continuous, automated data ingestion just wasn't practical with old-school batch loading. Across industries, from manufacturing floors to financial markets, companies are using Snowpipe to turn raw data streams into immediate, actionable insights.

Let's dig into four common scenarios where Snowpipe is making a massive difference, shifting operations from reactive to proactive.
Streaming IoT Sensor Data for Predictive Maintenance
Picture a factory floor humming with thousands of machines. Each one is equipped with sensors churning out a constant stream of data on temperature, vibration, and overall performance. Traditionally, this data might get collected and analyzed at the end of the day, but by then, a costly breakdown might have already happened.
The core challenge is getting that high-volume, high-velocity IoT data analyzed fast enough to spot anomalies signaling a potential equipment failure.
Here’s how Snowpipe solves it:
- Continuous Ingestion: Sensor data is streamed into a cloud storage bucket, like AWS S3.
- Automated Loading: The moment new data hits the bucket, Snowpipe grabs it and loads it into Snowflake tables. No manual steps, no delays.
- Real-Time Analytics: Analysts and machine learning models can then query this live data to find the subtle patterns that come before a failure, letting maintenance teams step in before a machine goes down.
This proactive approach slashes downtime, cuts repair costs, and helps extend the life of critical machinery.
Real-Time Clickstream Analysis for Personalization
An e-commerce website is a data goldmine, generating thousands of data points every second—clicks, searches, cart adds, you name it. To deliver a truly personal shopping experience, you have to react to a user’s behavior while they are on your site, not hours later.
The difficulty lies in processing that firehose of clickstream data quickly enough to actually influence a user's current session.
Snowpipe makes this possible:
- Data Capture: All the website event data is funneled into a staging area in the cloud.
- Immediate Availability: Snowpipe loads this clickstream data right into Snowflake, making it instantly queryable.
- Dynamic Recommendations: A recommendation engine can then hit this fresh data to serve up personalized product suggestions and targeted offers while the shopper is still browsing.
By closing the gap between a customer's action and the website's reaction, retailers can see a real lift in engagement, conversion rates, and average order value.
Application Log Monitoring for Threat Detection
Modern apps throw off a ton of log files, packed with crucial info on system performance, user activity, and potential security threats. Trying to sift through these logs by hand is a non-starter, and batch analysis often means you discover a breach long after the damage is done.
The main hurdle is analyzing all these logs in near real-time to catch security threats or system errors before they snowball into major problems.
Snowpipe provides a powerful solution:
- Log Aggregation: Logs from all your different sources are centralized into a single cloud storage location.
- Automated Ingestion: Snowpipe works around the clock, continuously loading these logs into structured Snowflake tables.
- Instant Alerting: Security teams can run queries that constantly scan the incoming data, setting up alerts for suspicious patterns—like a sudden spike in failed login attempts from a single IP.
This gives teams the power to respond to threats in minutes, not days, which is a game-changer for securing systems and maintaining high availability.
Instant Fraud Analysis in Financial Services
In the world of banking and payment processing, speed is everything when it comes to stopping fraud. A fraudulent transaction that slips through the cracks can mean big financial losses and, just as importantly, a loss of customer trust.
The challenge is clear: you need to process millions of transactions a minute to spot and block fraud before it happens.
This is a perfect fit for Snowpipe:
- Transaction Streaming: Transaction data flows nonstop into a designated cloud storage stage.
- Low-Latency Loading: Snowpipe ingests this data almost instantly, feeding it directly into sophisticated fraud detection models.
- Immediate Action: These models analyze transaction patterns against historical data in real time, flagging suspicious activity for immediate review or even automatic blocking.
This rapid cycle of ingestion and analysis is essential for cutting down on financial losses. Many organizations are now pushing for even lower latency; for more on that, check out our guide on streaming MongoDB to Snowflake with Snowpipe Streaming.
Setting Up Your First Snowpipe
Alright, let's move from theory to action. This is where you get to see just how powerful Snowpipe can be. We're going to build a simple, automated data pipeline that connects a cloud storage bucket directly to a table in Snowflake.
I'll walk you through the whole process, step-by-step. For this guide, we’ll use Amazon S3 as our cloud storage. By the time we're done, you’ll have a live, event-driven pipeline that automatically loads new data as soon as it arrives.
Step 1: Get Your Storage and Target Table Ready
First things first: Snowpipe needs a source and a destination. That means we need an S3 bucket to drop our files into and a target table in Snowflake for the data to land.
Start by creating a new S3 bucket in your AWS account. It's a good habit to create specific folders inside your bucket to keep things organized. For our example, let's say we have a bucket named my-data-bucket and a folder inside it called new-files.
Next, hop over to Snowflake and create the table where this data will end up. The table's columns must match the structure of the files you plan to load. If we’re loading CSV files containing user info, the table might look like this:
CREATE OR REPLACE TABLE raw_user_data (
user_id INT,
first_name VARCHAR,
last_name VARCHAR,
email VARCHAR,
registration_date DATE
);
Simple enough. We now have a clear destination for our incoming data.
Step 2: Create an External Stage in Snowflake
With our S3 bucket and Snowflake table in place, the next move is to build a bridge between them. In Snowflake, this bridge is called an external stage.
Think of a stage as a signpost. It tells Snowflake exactly where to look for files in your S3 bucket and holds the credentials needed to access them securely. To avoid pasting secret keys directly into your code, we’ll use a storage integration. This object securely manages the connection to your cloud storage provider.
Here’s how you create the integration:
CREATE OR REPLACE STORAGE INTEGRATION s3_integration
TYPE = EXTERNAL_STAGE
STORAGE_PROVIDER = S3
ENABLED = TRUE
STORAGE_AWS_ROLE_ARN = 'arn:aws:iam::ACCOUNT_ID:role/snowflake-access-role'
STORAGE_ALLOWED_LOCATIONS = ('s3://my-data-bucket/new-files/');
After running this, you'll need to configure the IAM role in your AWS account to grant Snowflake access. Once that's done, you can create the stage itself, pointing it to the integration you just made.
CREATE OR REPLACE STAGE my_s3_stage
STORAGE_INTEGRATION = s3_integration
URL = 's3://my-data-bucket/new-files/'
FILE_FORMAT = (TYPE = 'CSV' SKIP_HEADER = 1);
Now, our stage is set up and ready to read CSV files from our S3 folder, even skipping the header row for us.
Step 3: Define and Build the Snowpipe
Now for the main event—creating the Snowpipe. The CREATE PIPE command is what actually defines the pipeline, linking our external stage to our target table.
The magic happens with one key parameter: auto_ingest = true. This tells Snowpipe to listen for S3 event notifications and automatically kick off a data load whenever a new file is detected.
CREATE OR REPLACE PIPE user_data_pipe
AUTO_INGEST = TRUE
AS
COPY INTO raw_user_data
FROM @my_s3_stage;
This single command creates a pipe named user_data_pipe. Behind the scenes, it's now armed and ready to run a COPY INTO command the moment a new file lands in @my_s3_stage.
Once you create the pipe, Snowflake gives you a unique Amazon SQS queue ARN. You’ll need to copy this ARN and use it to set up event notifications on your S3 bucket. This is the final link in the chain that lets S3 tell Snowpipe, "Hey, a new file just arrived!"
Step 4: Test and Monitor Your Pipeline
With your Snowpipe configured and the S3 event notifications set up, it's time for a test run. Upload a new CSV file to your s3://my-data-bucket/new-files/ folder.
Go grab a coffee. Within a minute or two, Snowpipe should have automatically spotted the new file, ingested it, and loaded the data right into your raw_user_data table.
But how do you know it worked? Snowflake gives you a few ways to check:
- Check the Pipe's Status: See if the pipe is running correctly and check for any errors.
SELECT SYSTEM$PIPE_STATUS('user_data_pipe'); - Review Load History: Get a detailed log of every file your pipe has ingested.
SELECT * FROM TABLE(information_schema.load_history(TABLE_NAME=>'raw_user_data')); - Query the Table: The easiest check of all—just see if the data is there!
SELECT * FROM raw_user_data LIMIT 10;
And that’s it! You've just built a fully automated, hands-off data pipeline. This is the bedrock of building real-time analytics with your Snowpipe Snowflake setup.
Optimizing Your Snowpipe for Cost and Performance
Snowpipe is incredibly efficient right out of the box, but with a few smart adjustments, you can take your data pipelines from good to great. The key is to manage your setup proactively, ensuring you get the best performance without burning through credits unnecessarily. It all comes down to how you prepare your data before it even hits the pipe.
The single biggest factor in Snowpipe cost optimization is file size. Snowpipe has a small overhead cost for every single file it processes. That means loading thousands of tiny files is way more expensive than loading the exact same amount of data in a few larger, consolidated files. Think of it like shipping packages—it's much cheaper to send one big box than hundreds of small envelopes.
The Power of Proper File Sizing
Your main goal should be to batch data into bigger files before they land in your cloud storage stage. This one change can have a massive impact, slashing the file management overhead and leading to some serious cost savings and quicker load times.
As a rule of thumb, aim for file sizes between 100 MB and 250 MB. Files smaller than that trigger too many notifications and drive up costs, while massive files can be clunky and less efficient for Snowpipe to process.
By batching smaller records into optimally sized files, you minimize the per-file processing cost that Snowpipe charges. This is often the single most effective strategy for controlling your ingestion spend.
Monitoring Your Pipeline's Health and Spend
You can't fix what you can't see. Thankfully, Snowflake gives you excellent tools to keep an eye on your Snowpipe's activity and costs, so you have all the information you need to make smart adjustments.
The PIPE_USAGE_HISTORY view is your best friend here. A simple query against this function provides a detailed log of credit consumption for each pipe over time.
SELECT * FROM TABLE(information_schema.pipe_usage_history(...));
This query helps you:
- Track Credit Burn: See exactly which pipes are your biggest spenders.
- Spot Inefficiencies: Catch sudden cost spikes that might point to an issue, like a sudden flood of tiny files.
- Forecast Costs: Use past data to get a realistic handle on future ingestion expenses.
Checking this view regularly helps you stay on top of any issues and ensures your pipelines are running as lean as possible. For a deeper dive into cost-saving strategies, you might be interested in our guide on optimizing Snowflake for lower costs with the Snowpipe Streaming API.
Building Resilient Error Handling
Finally, a truly optimized pipeline is a resilient one. Real-world data is messy, and your Snowpipe needs to be able to handle errors without grinding to a halt. By default, if a COPY INTO command runs into a file with bad data, it might skip that file altogether.
You can easily configure your COPY options to be more flexible. For example, setting ON_ERROR = 'CONTINUE' tells Snowpipe to load all the good rows it finds in a file and just skip the bad ones. This simple change ensures that a few corrupted records don't stop the rest of your good data from getting where it needs to go, keeping your analytics up-to-date and your pipeline running smoothly.
Frequently Asked Questions About Snowpipe
As you dig into Snowpipe, a few common questions always seem to pop up. Let's tackle them head-on so you can get a clearer picture of how it works and where it fits best.
What Is the Difference Between Snowpipe and Snowpipe Streaming?
It really comes down to how your data is packaged.
Think of the classic Snowpipe as your go-to for loading data from files as they land in cloud storage. It’s event-driven, meaning it springs into action when a new file appears, making it perfect for ingesting data that arrives in batches—whether they're tiny or huge.
Snowpipe Streaming, on the other hand, is built for a different kind of data flow. It's designed to pull data row-by-row, directly from sources like Apache Kafka, without ever needing to create intermediate files. This approach slashes latency, making it the right choice for genuine real-time applications where every second matters.
Can Snowpipe Load Data from On-Premises Sources?
Not directly, no. Snowpipe is built to connect seamlessly with the big cloud storage providers: Amazon S3, Azure Blob Storage, and Google Cloud Storage.
To get your on-premises data into a Snowpipe Snowflake pipeline, you’ll need a two-step process. First, you have to move those files from your local servers into a supported cloud storage stage. As soon as the files hit that cloud bucket, Snowpipe takes over and ingests them automatically.
How Much Does Snowpipe Cost?
Snowpipe pricing is all about paying for what you actually use. You’re billed based on the compute resources consumed during ingestion, which is measured down to the second.
Essentially, you pay a per-second rate for the time Snowpipe is actively loading your data, plus a tiny overhead charge for each file it discovers. This model is incredibly cost-effective because, unlike a traditional virtual warehouse, you’re never paying for idle compute time.
Ready to build faster, more efficient data pipelines? Streamkap provides a real-time CDC platform that syncs your data to Snowflake with minimal latency, replacing slow batch jobs. Learn more and start your journey at https://streamkap.com.