A Guide to Snowflake Snowpipe Streaming


September 24, 2025
Snowflake's Snowpipe Streaming is a game-changer for getting data into your warehouse. It's built for real-time data ingestion, letting you stream data directly into your tables with millisecond latency. This completely bypasses the old method of staging files, creating a continuous, live flow of row-level data that's ready for analysis the moment it arrives.
Why Does Real-Time Data Ingestion Matter So Much?
For years, the data analytics world ran on batch processing. You'd let data pile up for hours—sometimes even a full day—before loading it into the warehouse in a massive, scheduled dump. This worked just fine for historical reports and BI dashboards where being a day behind was acceptable.

But things are different now. Today's businesses live and die by their speed and ability to react. Waiting hours for critical data to show up is a massive competitive disadvantage.
The Big Shift from Batch to Streaming
Think about what happens when data is delayed. It's not just an inconvenience; it can have a real impact on the business.
Here are a few scenarios where yesterday's data is practically useless:
- Live Fraud Detection: An online retailer needs to spot and block a fraudulent purchase the second it happens. If they have to wait for an hourly batch load, thousands of fraudulent transactions could already be approved.
- Dynamic Customer Personalization: A media service wants to suggest a new show based on what a user is watching right now. Relying on last night's viewing history means missing a huge opportunity to keep them engaged.
- Real-Time Inventory Management: A global logistics firm has to track its inventory across the entire supply chain in real-time to avoid running out of stock and to keep routes efficient. A delay of even a few minutes can cause major disruptions.
These examples all point to one thing: the old way of periodically dumping data just doesn't cut it anymore. We need a constant, uninterrupted flow of information.
How Snowpipe Streaming Fills the Gap
This is exactly the problem that Snowflake Snowpipe Streaming was built to solve. It finally closes the gap between when an event happens and when that data is actually available for you to use, making true real-time analytics possible right inside the Snowflake ecosystem.
Let's be honest, Snowflake's original architecture was built around batching. This was a major limitation for anyone trying to build applications that needed immediate insights. With Snowpipe Streaming, you can now push row-level data continuously, hitting the sub-second latency that modern apps demand.
To see just how different these two approaches are, let's break it down.
Batch Processing vs. Snowpipe Streaming
This comparison really highlights the fundamental shift. We're moving from a passive, historical view of data to an active, in-the-moment one.
By creating a direct, low-latency pipeline, Snowpipe Streaming transforms Snowflake from a powerful but passive data warehouse into a dynamic platform for live, interactive data applications. It’s what powers insights that happen now.
Ultimately, adopting this technology isn't just a technical upgrade—it's a strategic move. It gives you the power to build more responsive products, make faster, more informed decisions, and create far more engaging experiences for your customers. For a deeper look at this, check out our guide on https://streamkap.com/blog/real-time-data-streaming-with-snowflake-unlocking-low-latency-analytics-and-genai-with-streamkap. It’s all about unlocking analytics that reflect reality as it happens, not as it was yesterday.
Laying the Groundwork in Snowflake for Streaming Ingestion
Before you can start pumping data through Snowflake Snowpipe Streaming, you need to get your Snowflake environment ready. Taking the time to configure things properly upfront is a game-changer. It helps you dodge common permission errors and makes sure your pipeline is secure, efficient, and cost-effective right out of the gate.
Think of it like building a house. You wouldn't just start framing walls without pouring a solid foundation first. In Snowflake, that foundation is made up of the right database, schema, tables, and—this is a big one—a role with very specific, limited permissions. I've seen teams try to rush this part, and it almost always leads to frustrating connection problems and security holes later.
Creating the Essential Snowflake Objects
First things first, your data needs a place to live. That means creating a dedicated database and schema. You could, of course, use an existing setup, but creating new ones just for this streaming workload is a much cleaner approach for organization and access control.
Once the database and schema are in place, you need to define the target table where all that streaming data will land. Getting the data types right at this stage is absolutely crucial. A mismatch between your source data and the table schema is one of the most common reasons for ingestion failures. Make sure your columns—like VARCHAR for strings, NUMBER for integers, and TIMESTAMP_NTZ for timestamps—match what's coming in.
I often see people create a "catch-all" table with every column set to
VARCHAR, thinking they'll sort it out later. This really defeats the purpose of real-time streaming and just adds unnecessary complexity and cost down the line. Get the schema right from the start.
For a setup that's truly scalable and easy to manage, applying Infrastructure as Code best practices can be a lifesaver. It lets you automate the creation of these resources, ensuring every environment you spin up is identical and reproducible.
Crafting a Dedicated Role and Warehouse
Now for what I consider the most critical step: creating a dedicated Snowflake role just for your streaming application. It can be tempting to just use a powerful role like SYSADMIN or ACCOUNTADMIN to get things working quickly, but please don't. That's a huge security risk.
The right way to do this is to create a brand new role and grant it only the permissions it absolutely needs to do its job. This is the principle of least privilege, and it's a cornerstone of any secure data architecture.
Your new role needs a few specific grants:
USAGEon the database and schema where your table is located.INSERTandSELECTon the target table. Critically, the role must also be theOWNERof the table to work correctly with Snowpipe Streaming.USAGEon a dedicated warehouse that will handle the ingestion compute.
Giving your ingestion workload its own warehouse is a pro move for both performance and cost management. It stops your streaming traffic from fighting for resources with your analytics queries, which keeps everything running smoothly. Plus, it makes it incredibly easy to track the exact costs of your Snowflake Snowpipe Streaming pipeline. By isolating the compute, you can see exactly how many credits streaming is using and find opportunities to optimize.
Alright, with your Snowflake environment prepped and ready to go, let's get our hands dirty and build your first real-time data pipeline. We're moving past the theory and into the practical stuff—actually getting data from an application into a Snowflake table using the Snowflake Snowpipe Streaming Java SDK. I'll walk you through the core mechanics of getting authenticated, making the connection, and pushing data.
First things first: authentication. When connecting an application to Snowflake, especially for something as critical as streaming, you want to do it securely. The best practice here is key pair authentication. Forget about embedding usernames and passwords in your code; that's a security nightmare waiting to happen.
The process is straightforward. You generate a public and a private key on your local machine. The private key is your application's secret handshake—it never leaves your app. The public key, on the other hand, gets assigned to that dedicated Snowflake user we created earlier. This way, Snowflake knows to trust any connection that can prove it holds the corresponding private key.
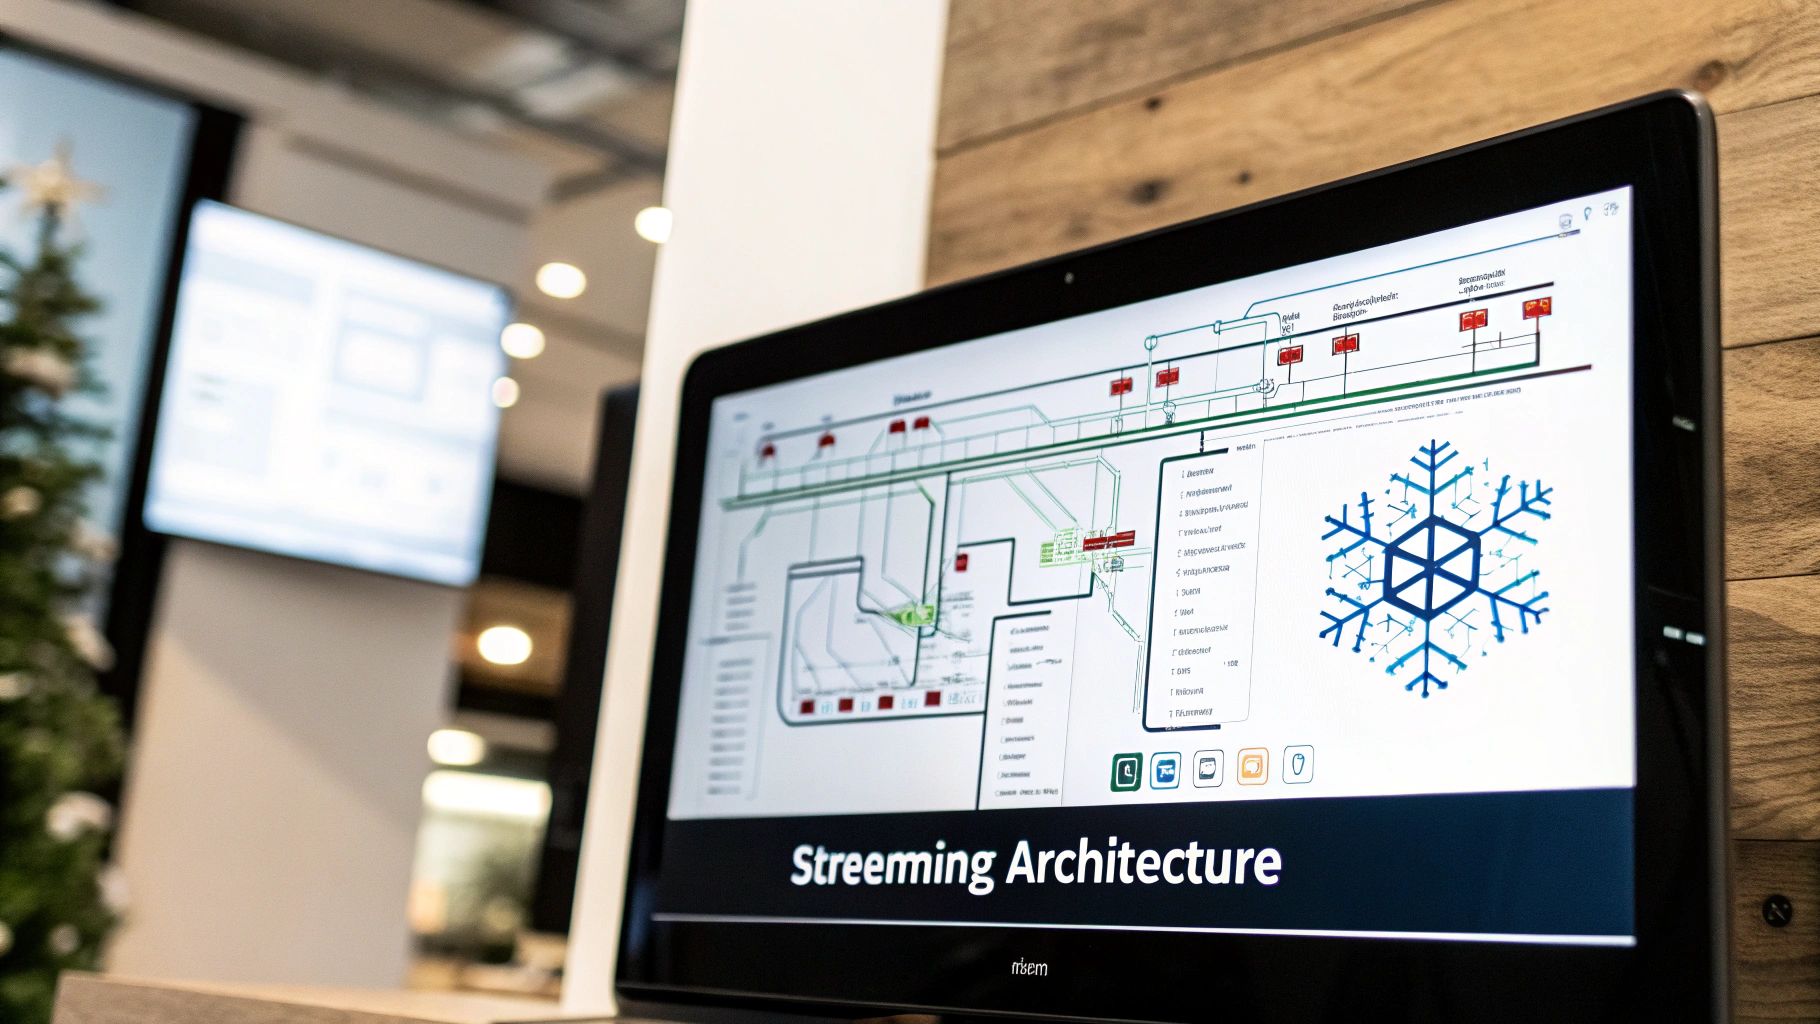
This whole process is about creating a continuous, real-time flow of data, as you can see below.
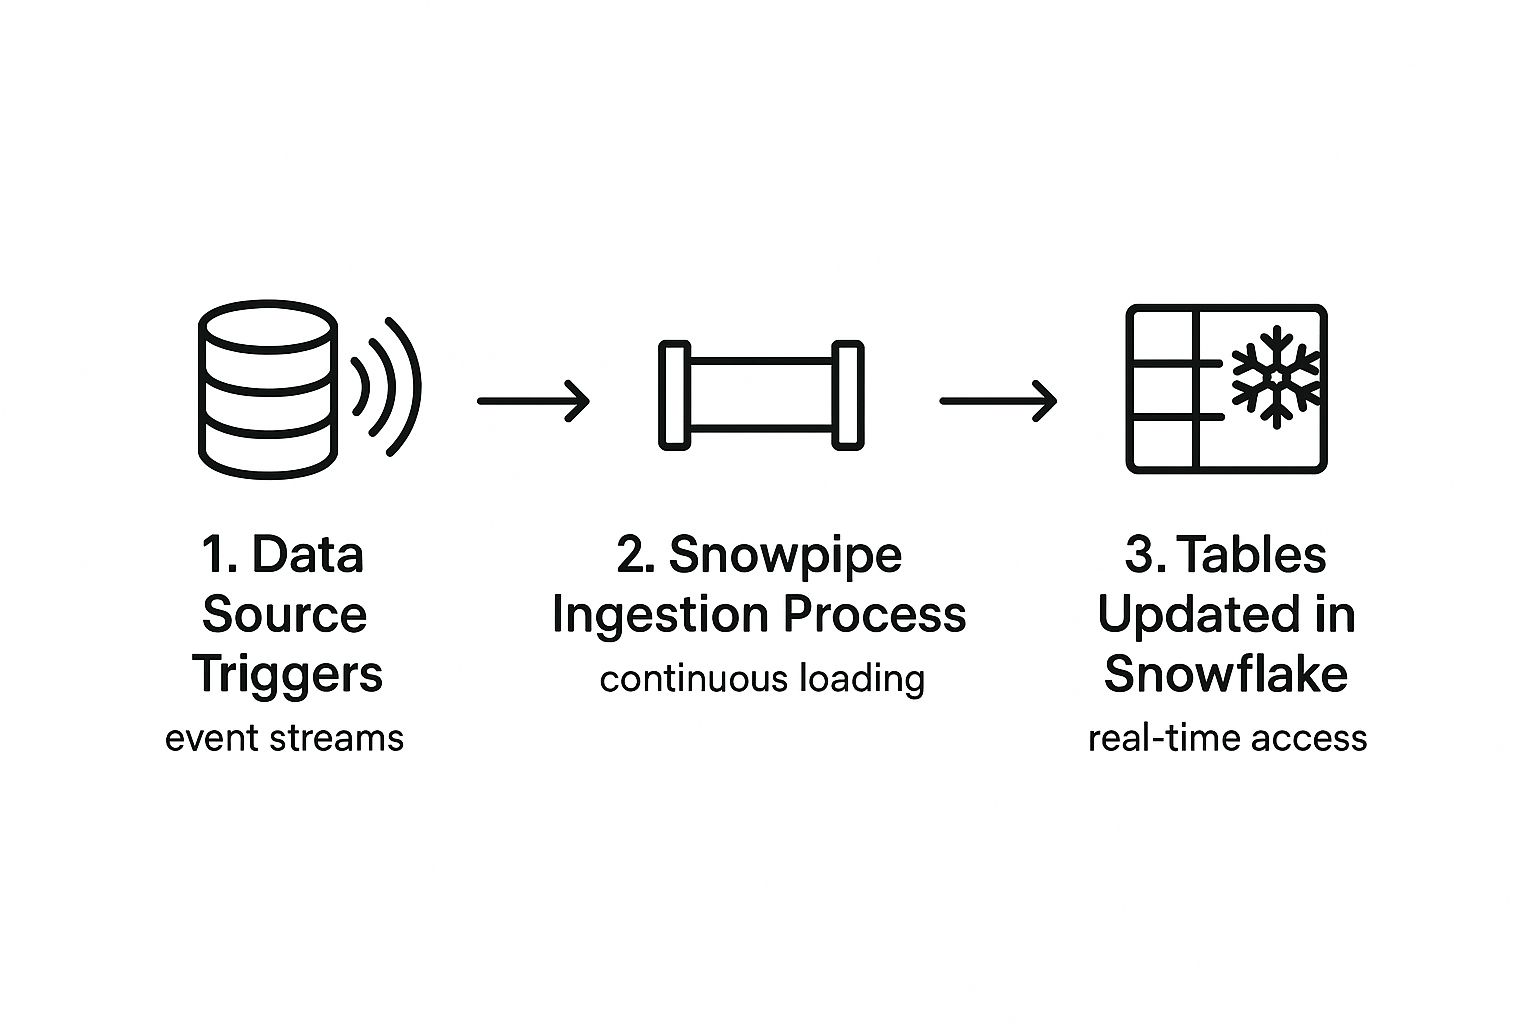
As the diagram shows, it's all about eliminating the old start-and-stop batch loading process and embracing a constant stream of updates.
Setting Up the Java SDK Client
With your keys generated and assigned, it's time to configure the Snowpipe Streaming client inside your Java application. The SDK uses a simple properties map to hold all your connection details. Think of this as the bridge connecting your code to your Snowflake account.
You'll need to set a few key properties to get things running:
account: Your full Snowflake account identifier, likeorgname-accountname.user: The dedicated user you set up for this, such asSTREAMING_USER.private_key: The actual content of your private key file.role: The specific role that has all the permissions it needs (e.g.,STREAMING_ROLE).
Getting these details right is critical. I've seen countless connection failures caused by simple mistakes, like using the wrong account identifier or forgetting to specify the role. A pro tip: never hardcode these values. Store them in a secure configuration file or as environment variables to keep your credentials safe.
Opening Channels and Pushing Data
Once the client is initialized, you need to understand the concept of a channel. A channel is essentially a dedicated, stateful connection from your application to a specific table in Snowflake. Imagine it as a private data lane on a highway, built just for one table.
A single client instance can juggle multiple channels at once, each pointed at a different table. This is incredibly efficient. It means one application can stream data to various destinations in your data warehouse without needing to spin up multiple clients.
To actually send data, you open a channel to your target table and use either the insertRow() or insertRows() method. These methods simply take a map of your column names and their corresponding values, which the client then streams directly to Snowflake.
For example, if you're capturing change data from a database like PostgreSQL, each event can be formatted into a row and pushed through the right channel. If you want to see a full, end-to-end example of that, our guide on streaming from PostgreSQL to Snowflake breaks it all down.
Finally, always remember to manage the connection lifecycle. When your application is finished, close the channel and the client. This releases the resources properly and ensures a clean shutdown, preventing orphaned connections that can lead to weird performance issues or even unexpected costs. This simple example provides a solid template you can build on for almost any data source you can think of.
How to Monitor and Validate Your Data Stream
So, your pipeline is up and running. The big question now is, “Is it actually working?” Setting up a data stream without a way to watch it is like flying blind. You need to be sure that data is not only leaving its source but also landing correctly and on time in your Snowflake warehouse.
The quickest and easiest way to check is to just query the target table directly. A simple SELECT COUNT(*) will tell you if the row count is climbing. If you want a closer look, run something like ORDER BY your_timestamp_column DESC LIMIT 10. This lets you peek at the most recent records to make sure the content looks right and the timestamps are current.
Tapping into Snowflake’s Built-In Monitoring Tools
Simple queries are great for a quick gut check, but for a real deep dive, you'll want to use Snowflake's own system views. These are specifically built to monitor Snowflake Snowpipe Streaming and give you a detailed picture of your pipeline's health, performance, and cost. It's how you move from just hoping it works to knowing it does.
A function I find myself using all the time is SNOWPIPE_STREAMING_CLIENT_HISTORY. This is your first stop for looking at the metadata of recent data insertions from a specific client. It's perfect for answering critical questions like:
- Which specific client was responsible for inserting this batch of rows?
- How many rows have we processed in the last hour?
- What were the offset tokens associated with a particular channel?
Think of it as a detailed receipt for every single transaction your streaming client completes with Snowflake.
Keeping Tabs on Load History and Credit Usage
While the client history is fantastic for near-real-time checks, the LOAD_HISTORY view gives you a much broader look at all data loading activities, including your streaming jobs. You can filter this view to see the status of your streams, hunt for errors, and track ingestion volumes over time. It’s a goldmine for spotting trends or figuring out exactly when a problem began.
Of course, we can't forget about cost. Snowflake Snowpipe Streaming has two main cost components: the client-side ingestion and the server-side process that migrates that data into your final table. To track the compute cost of that migration, you can query the WAREHOUSE_METERING_HISTORY view. Just make sure to filter it for the specific virtual warehouse you dedicated to your streaming workload.
For any pipeline running in production, keeping a close eye on these views is absolutely essential. It’s how you get ahead of credit consumption and catch issues before they snowball and affect your downstream analytics or applications.
This push for strong monitoring fits right in with where the industry is heading. At the Snowflake Summit 2025, the company unveiled Snowflake Openflow, a new service that works alongside Snowflake Snowpipe Streaming to make it easier to ingest data from literally any source. This announcement, made on June 3, 2025, is all about breaking down old barriers and creating a unified data integration experience across different clouds and systems.
This strategic move toward seamless data interoperability and AI readiness just highlights how important solid validation practices are. When you pair powerful ingestion tools with diligent monitoring, you’re on your way to building a truly reliable, efficient, and transparent data pipeline.
Advanced Strategies and Real-World Examples

Getting a basic pipeline running is just the start. The real magic happens when you start combining Snowflake Snowpipe Streaming with other native Snowflake features. A particularly powerful combination is pairing it with Snowflake Streams to build a robust architecture for real-time Change Data Capture (CDC).
This setup moves you beyond simple data ingestion and into the realm of reacting to data changes as they happen. You're not just loading new rows anymore; you're capturing every single INSERT, UPDATE, and DELETE from your source systems and pushing those events into Snowflake for immediate analysis and action.
Real-World Applications in Action
So, what does this look like in practice? In the financial world, this kind of real-time CDC is the backbone of modern fraud detection systems. Imagine a stream of transaction data flowing into Snowflake. The instant a suspicious UPDATE or INSERT hits the system, it can trigger an automated alert or even freeze the transaction before it's completed.
Over in e-commerce, this same approach is perfect for live inventory management. When a customer buys a product, that change streams directly into Snowflake. This instantly updates inventory counts across the board, preventing the dreaded overselling scenario during a flash sale or a holiday rush. These aren't just hypothetical ideas; this is happening at scale today.
Pairing Snowpipe technology with the Streams feature creates a powerful duo for real-time data enrichment and CDC. This is widely adopted by large enterprises for dynamic, time-sensitive insights.
Think about companies like DoorDash or Uber. They rely on this type of architecture to ingest massive volumes of user behavior data from their mobile apps, allowing them to fine-tune the customer experience in real time. Financial giants like PayPal do the same, constantly monitoring transaction data to catch and respond to fraudulent activity in the blink of an eye.
Best Practices for Scalable Streaming
As you scale these solutions, a few best practices will save you a lot of headaches. You need to think about performance, cost, and how you handle errors.
One of the biggest performance wins comes from managing your client connections properly. Don't fall into the trap of creating a new client for every single request. Instead, maintain a long-lived client instance. This simple change dramatically reduces overhead and cuts down on connection latency.
Cost management is another huge piece of the puzzle. Keep a close eye on your ingestion warehouse and be ready to resize it based on your actual workload. It might sound counterintuitive, but sometimes a smaller, continuously running warehouse is cheaper than a larger one that’s constantly starting and stopping. We dive deeper into this in our guide on optimizing Snowflake for lower costs with the Snowpipe Streaming API.
Finally, build robust error handling into your client application from day one. You need a plan for dealing with transient network hiccups or schema mismatches without bringing the entire pipeline to a halt. A resilient pipeline is a successful pipeline.
Answering Your Top Snowpipe Streaming Questions
When you start working with a powerful tool like Snowflake Snowpipe Streaming, a few questions always pop up. Getting straight answers to these can save you a ton of time down the road and help you build a much smarter, more efficient pipeline right out of the gate. Let's break down the most common ones I hear.
Snowpipe vs. Snowpipe Streaming: What's the Real Difference?
This is probably the number one point of confusion. They share the "Snowpipe" name, but they are built for fundamentally different jobs.
The classic Snowpipe is all about micro-batching. It's brilliant at automatically hoovering up files from an external stage, like an Amazon S3 bucket, as soon as they land. This is your go-to for any file-based data drops where a latency of a few minutes is perfectly fine.
Snowpipe Streaming, on the other hand, is a completely different beast. It's a row-based ingestion method that uses an SDK to push data directly into Snowflake tables from your applications or message queues. It completely skips the "drop a file and wait" step, which is how it achieves that coveted sub-second, real-time latency.
Think of it this way: Snowpipe is for automated file loading when minute-level latency is acceptable. Snowpipe Streaming is for when you need to ingest data row-by-row, right now, for true real-time analytics.
How Does Snowpipe Streaming Pricing Actually Work?
Understanding the cost model is non-negotiable before you push anything to production. The pricing for Snowflake Snowpipe Streaming isn't just one number; it's a combination of two separate charges you'll see on your bill.
First up are the client ingestion costs. Snowflake charges you per gigabyte for the data your application sends through the client SDK. This is basically the fee for pushing the data into Snowflake’s temporary storage layer.
Second, you'll see migration compute costs. This is the server-side charge. It covers the compute resources—billed per-second—used to take those streamed rows from the temporary layer and flush them into your final destination table.
Is It Just for Java? Expanding Beyond the Original SDK
When Snowpipe Streaming first launched, the Java SDK was the only game in town. Thankfully, that's no longer the case. Snowflake has really expanded its ecosystem to support the tools modern data teams are actually using.
You're no longer locked into one language. Today, you'll find official SDKs and connectors for a bunch of popular technologies:
- Kafka Connector: The obvious choice for integrating directly with your Kafka topics.
- Python SDK: A huge win for anyone working in the vast Python data ecosystem.
- Go SDK: Perfect for teams building high-performance, concurrent streaming apps in Go.
My best advice here is to always check the latest Snowflake documentation before kicking off a new project. The list of supported clients is always growing and features are constantly being added. A quick check upfront ensures your tech stack is fully supported.
Ready to skip the complexities of managing SDKs and building pipelines from scratch? Streamkap offers a fully managed, real-time data ingestion platform that combines Change Data Capture (CDC) with Snowpipe Streaming for incredible performance and simplicity. You can get your data flowing into Snowflake in minutes, not weeks. Check it out at https://streamkap.com.

Related blog posts
