<--- Back to all resources
Apache Flink Python Support with Streamkap
Get started with Apache Flink Python support with Streamkap. This guide shows you how to build real-time data pipelines using PyFlink and Streamkap for CDC streams.
Python developers, you can now build powerful, real-time streaming applications using Apache Flink’s Python API with Streamkap, and you don’t need to be a Java or Scala guru to do it. This combination makes creating sophisticated data pipelines much more straightforward. You get to use the Python tools you already know and love to process real-time data streams that Streamkap sources effortlessly through Change Data Capture (CDC).
What you’re left with is a modern, efficient stack for building scalable applications without the usual operational headaches.
The Power of Python in Real-Time Stream Processing
For a long time, high-performance stream processing felt like it was reserved for developers working with JVM languages like Java and Scala. While those languages are undeniably powerful, this created a significant barrier for the massive community of Python developers, data scientists, and ML engineers who live and breathe in Python’s rich ecosystem.
The introduction of PyFlink, Apache Flink’s Python API, was a big step forward. It completely changed the field, making distributed stream processing accessible to a much wider audience.

This was a deliberate move. Apache Flink rolled out PyFlink with version 1.9 back in 2019, recognizing that Python had become the go-to language for data professionals everywhere. This shift meant developers could finally apply their existing Python skills to build the kind of complex, stateful streaming applications that were previously out of reach.
Why Combine PyFlink with Streamkap?
Pairing PyFlink with Streamkap creates an architecture that’s both powerful and refreshingly simple. Streamkap tackles the notoriously difficult “first mile” of data ingestion. It captures every single database change in real-time and streams it neatly into managed Kafka topics. This completely removes the operational burden of wrangling Debezium, Kafka Connect, and schema registries on your own.
This combination lets your team focus entirely on the business logic inside your Python code.
By offloading data sourcing and infrastructure management to Streamkap, developers can concentrate on what they do best: writing Python code to extract value from data streams. This separation of concerns speeds up development cycles and dramatically lowers the barrier to entry for real-time analytics.
Key Advantages of This Modern Stack
When you bring PyFlink and Streamkap together, you get a few distinct benefits that really simplify development and boost operational efficiency. This combination directly addresses the most common pain points we see in building and maintaining real-time data systems.
Combining these technologies creates a powerful, developer-friendly environment. Below is a quick summary of the core benefits you can expect.
Key Advantages of the Flink Python and Streamkap Stack
BenefitImpact on Development and OperationsSimplified DevelopmentWrite stream processing logic in Python, a language known for its simplicity and vast libraries, without getting bogged down in low-level streaming infrastructure.Zero-Ops Data SourcingStreamkap delivers a fully managed CDC and Kafka platform, so your team never has to deploy, configure, or maintain these critical—and complex—components.Automated Schema ManagementStreamkap automatically handles schema evolution from the source database, which prevents your PyFlink jobs from breaking when database tables are altered.Reduced LatencyAchieve true end-to-end data processing with sub-second latency, enabling real-time applications that go from database change to processed insight in a flash.
This stack makes building reliable, real-time systems much more achievable.
This approach not only makes real-time processing more accessible but also more reliable. If your team is also exploring other languages for stream processing, you might be interested in our guide on Apache Flink TypeScript support with Streamkap.
Getting Your PyFlink Development Environment Ready
Before you can start building powerful streaming pipelines with Apache Flink’s Python API and Streamkap, you need to get your local development environment sorted out. A clean, reproducible setup is the foundation of any solid streaming project, and taking the time to get it right will save you a world of headaches later on.
First things first: your Python version. PyFlink is particular about this, so you’ll want to make sure you’re using a compatible version. I strongly recommend using Python 3.8 or newer. This ensures you’re aligned with the latest Flink releases and can tap into the broadest community support.
And here’s a piece of advice I can’t stress enough: always use a dedicated virtual environment. This keeps your project’s dependencies neatly separated from your system’s global Python installation, preventing the all-too-common “dependency hell” where different projects demand conflicting package versions.
Installing the Core Dependencies
With your virtual environment activated, it’s time to pull in the essential packages. The main one, of course, is apache-flink. A simple pip install will do the trick.
pip install apache-flink
This command fetches the core PyFlink libraries, giving you access to both the DataStream and Table APIs—the two workhorses you’ll be using to build your applications.
Since we’ll be plugging into Streamkap’s managed Kafka topics, you’ll also need a Python library to talk to Kafka. The most popular and reliable choice for this is kafka-python.
pip install kafka-python
My Pro Tip: Start a requirements.txt file from day one. Seriously. It makes your setup repeatable and is absolutely essential when you’re ready to package your job for deployment on Streamkap’s managed Flink service.
Now you have the basic tools to write the code. But writing code without a way to see it run against a live data stream is like trying to navigate in the dark. That’s why setting up a local testing environment is so important.
Simulating Your Production Setup with Docker
To really develop and test your PyFlink jobs properly, you need a local setup that mirrors what you’ll have in production. Streamkap uses Kafka for its change data capture (CDC) streams, so the best way to mimic this is to run local instances of Kafka and its sidekick, Zookeeper. Docker and Docker Compose make this almost trivial.
With a simple docker-compose.yml file, you can spin up a complete, multi-container environment with a single command. This gives you your own personal, isolated Kafka cluster right on your machine.
Here’s what this local stack typically looks like:
- Zookeeper: Kafka’s trusty coordinator. It manages the cluster’s state, configuration, and other critical housekeeping tasks.
- Kafka: The message broker itself. Your local instance will host the topics you need for testing, allowing your PyFlink script to consume data just as it would from Streamkap.
- A Data Producer (Optional but recommended): It’s also a great idea to add a simple Python script or another container that continuously pushes sample data into your local Kafka topic. This simulates the real-time flow you’d get from Streamkap.
Taking this approach is a massive advantage. You can verify your entire pipeline’s logic—from consuming and deserializing data to complex transformations and aggregations—without ever touching your production infrastructure. This creates a tight feedback loop that drastically speeds up development, letting you iterate on your code and squash bugs early. You can test everything from schema changes to error handling in a controlled environment, making sure your application is battle-tested and ready for the real world.
Connecting PyFlink to Streamkap CDC Streams
Okay, so your local environment is ready to go. Now for the fun part: actually connecting your Python code to the live data flowing from Streamkap. This is where we bridge the gap between setup and a real, working pipeline.
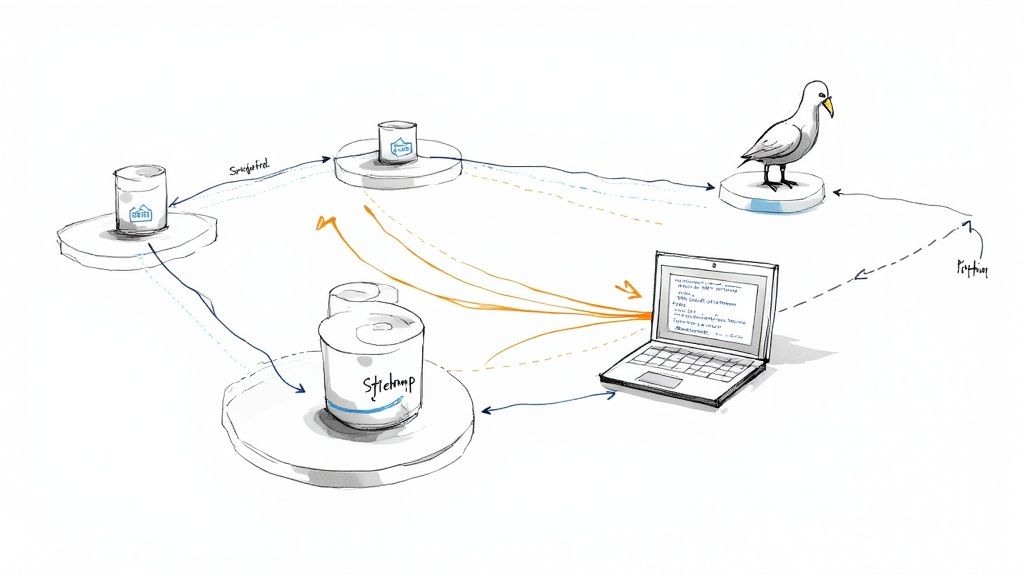
Streamkap is great at this. It uses Change Data Capture (CDC) to grab every single database event and push those changes into managed Kafka topics, all neatly packaged with an Avro schema. Your PyFlink application is going to tap directly into these topics.
To make this happen, you’ll need to configure the consumer in your PyFlink script. This involves grabbing a few key credentials from your Streamkap dashboard to create a secure, stable link. Think of it as giving your Flink job the exact address and keys to find and access the data stream.
This diagram shows the basic idea of getting Flink ready for Python before you hook it up to your data.
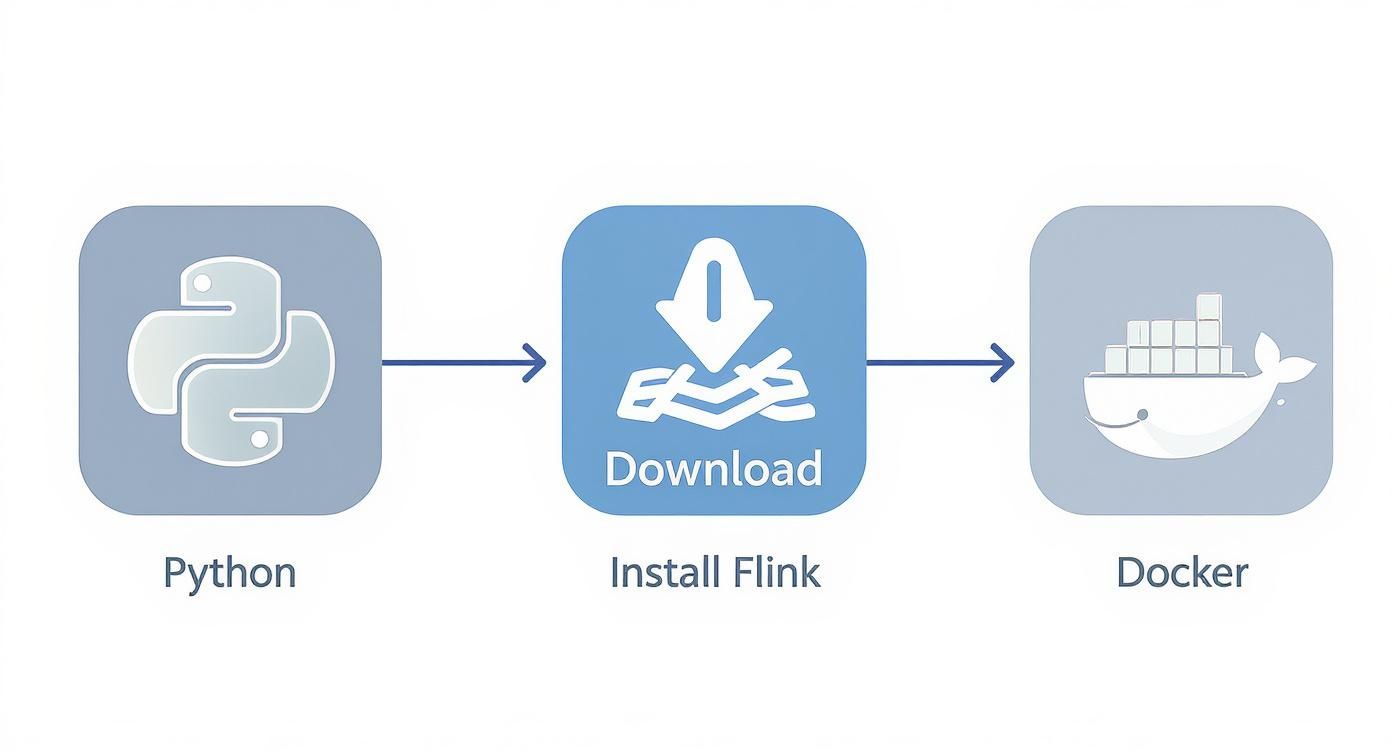
It boils down to three simple actions: getting the right Python version, installing the Flink package, and using Docker to get your environment running.
Finding Your Connection Details
You won’t have to go digging through obscure config files. Everything you need is laid out right in your Streamkap pipeline’s details page.
You’re looking for three main things:
- Bootstrap Servers: This is the address for Streamkap’s managed Kafka cluster.
- Topic Name: The specific Kafka topic where your CDC events are landing.
- Security Credentials: A username and password for SASL authentication.
All these details are grouped together to make connecting as straightforward as possible. No guesswork needed.
Configuring the Kafka Consumer in Python
Now, let’s turn those details into actual Python code. The main tool for this job is the FlinkKafkaConsumer class from the Apache Flink Python library. You’ll simply instantiate this class with the connection properties you just found.
Here’s a practical, copy-and-paste ready snippet to get you started. It shows how to configure the consumer to securely connect to your Streamkap topic and start pulling in those CDC records.
from pyflink.datastream import StreamExecutionEnvironment
from pyflink.datastream.connectors.kafka import FlinkKafkaConsumer
from pyflink.common.serialization import SimpleStringSchema
from pyflink.common.typeinfo import Types
def create_kafka_consumer():
env = StreamExecutionEnvironment.get_execution_environment()
# You’ll need the Kafka connector JAR for your Flink job
env.add_jars(“file:///path/to/flink-sql-connector-kafka-3.1.0-1.18.jar”)
properties = {'bootstrap.servers': 'your-streamkap-bootstrap-server.com:9092','group.id': 'my-pyflink-app','security.protocol': 'SASL_SSL','sasl.mechanism': 'PLAIN','sasl.jaas.config': ('org.apache.kafka.common.security.plain.PlainLoginModule required ''username="YOUR_STREAMKAP_USERNAME" ''password="YOUR_STREAMKAP_PASSWORD";')}# Streamkap uses Avro, so you'll eventually need a proper Avro deserializer.# For this quick example, we're just using a simple string schema to get started.kafka_source = FlinkKafkaConsumer(topics='your_database_server_name.your_schema.your_table',deserialization_schema=SimpleStringSchema(),properties=properties)data_stream = env.add_source(kafka_source)data_stream.print() # Print the stream to the console for verificationenv.execute("PyFlink Streamkap Consumer Job")
if name == ‘main’:
create_kafka_consumer()
This code block sets up your execution environment, defines the connection properties (including the SASL security config), and creates a DataStream object. This stream is your live feed of database changes, ready for you to start applying transformations, analytics, or any other business logic you have in mind.
My Takeaway: Honestly, the connection code is mostly boilerplate. Once you plug in the credentials from the Streamkap UI, you’re good to go. The real work—and the real value—begins once you have that stream and start deciding what to do with the data.
This smooth integration is exactly why platforms like Streamkap are becoming so central to modern data stacks. By handling the messy parts of CDC and Kafka management, they let developers focus on building applications, not plumbing. This leads to some serious performance gains and cost savings—we’ve seen customers cut costs by 54% to 66% while getting performance that’s up to 15 times faster than other solutions. This kind of efficiency is what makes building truly responsive, real-time systems possible.
Building Your First Real-Time Python Pipeline
Alright, with your environment set up and a live connection to Streamkap ready, it’s time to get our hands dirty and build a real-time Python pipeline. This is where the magic happens. We’ll walk through how to process live data streams using PyFlink’s two main interfaces: the DataStream API and the Table API/SQL. Each has its own strengths, and knowing when to use which is key.
To keep things grounded, let’s work with a common scenario: processing real-time profile updates from a users database table. Streamkap is already capturing every insert, update, and delete, streaming them into a Kafka topic as Avro records. Our job is to write a Python application that can consume this stream and do something useful with it.

This kind of architecture is quickly becoming the standard. We’re seeing a massive industry shift where companies are no longer just using Kafka as a simple message queue. Instead, they’re building sophisticated streaming applications directly on top of it, with Apache Flink leading the charge. You can read more about this trend and its implications for data streaming in 2024.
Processing Events with the DataStream API
The DataStream API is your go-to for low-level, granular control. Think of it as the programmatic way to handle your data. It’s perfect for complex event processing, managing custom state, or implementing logic that just doesn’t fit into a SQL query.
Let’s say our users CDC stream has records with fields like user_id, email, status, and last_updated. Our goal is simple: filter for only ‘active’ users and convert the raw data into a clean Python object.
First, you’d typically have a function to deserialize the Avro message. For this example, we’ll just assume the deserialized record is a dictionary.
A simple User class to hold our data
class User:
def init(self, user_id, email, status):
self.user_id = user_id
self.email = email
self.status = status
def __repr__(self):return f"User(id={self.user_id}, status='{self.status}')"
Example mapping function
def map_to_user_object(record):
# In a real app, this would involve Avro deserialization
# We’ll simulate with a dictionary
after_data = record.get(‘after’, {})
return User(
user_id=after_data.get(‘id’),
email=after_data.get(‘email’),
status=after_data.get(‘status’)
)
Once you have that mapping logic, you can chain operations directly onto your DataStream. We’ll .map() our function to each record and then .filter() out the ones we don’t want.
Assuming ‘data_stream’ is your Kafka source from the previous section
active_users_stream = data_stream
.map(map_to_user_object, output_type=Types.PICKLED(User))
.filter(lambda user: user.status == ‘active’)
active_users_stream.print()
This imperative approach is incredibly powerful. You can inject just about any Python logic you need, making it a natural fit for things like applying custom business rules or even running machine learning model inference on the fly.
Using the Table API and SQL for Declarative Transformations
While the DataStream API offers total flexibility, the Table API and SQL give you a higher-level, declarative way to work. This is often far simpler and more efficient for common ETL tasks like filtering columns, transforming values, and running aggregations. Better yet, Flink’s query optimizer can look at your SQL and figure out the most efficient way to execute it.
To get started, you first need to convert your DataStream into a Table.
from pyflink.table import StreamTableEnvironment
Create a Table Environment
table_env = StreamTableEnvironment.create(stream_execution_environment=env)
Convert the DataStream to a Table, defining the schema
This assumes your raw stream contains nested CDC data
user_changes_table = table_env.from_data_stream(
data_stream,
Schema.new_builder()
.column(“before”, DataTypes.ROW([
DataTypes.FIELD(“id”, DataTypes.BIGINT()),
DataTypes.FIELD(“status”, DataTypes.STRING())
]))
.column(“after”, DataTypes.ROW([
DataTypes.FIELD(“id”, DataTypes.BIGINT()),
DataTypes.FIELD(“status”, DataTypes.STRING())
]))
.column(“op”, DataTypes.STRING())
.build()
)
Register the Table so you can query it with SQL
table_env.create_temporary_view(“user_changes”, user_changes_table)
With the stream registered as a temporary table called user_changes, you can now run standard SQL against it. This is a big deal because it makes stream processing accessible to anyone who knows SQL—data analysts, backend engineers, and more.
A classic use case for this is windowed aggregations. For instance, counting the number of user profile updates every five minutes to monitor activity is quite involved with the DataStream API but is trivial with SQL.
Let’s write a quick query to pull the latest state for all active users.
active_users_query = ""
SELECT
after.id as user_id,
after.status as user_status
FROM user_changes
WHERE after.status = ‘active’ AND op = ‘u’ OR op = ‘c’
""
active_users_table = table_env.sql_query(active_users_query)
Convert the result Table back to a DataStream to sink or print
result_stream = table_env.to_data_stream(active_users_table)
result_stream.print()
This declarative style isn’t just easier to write and maintain; it also gives Flink the room it needs to perform serious optimizations behind the scenes. For many real-time analytics and ETL pipelines, the combination of Apache Flink Python support with Streamkap really hits its stride with the Table API and SQL.
So, which one should you choose? It really comes down to the job at hand:
- DataStream API: Your tool for complex, stateful operations, custom functions, and when you need precise, event-by-event control.
- Table API/SQL: The best choice for most standard transformations, aggregations, and windowing. It’s usually the recommended starting point because it’s simpler and often more performant.
By pairing Streamkap’s effortless data sourcing with the expressive power of PyFlink’s APIs, you’re well on your way to building solid, real-time data pipelines in record time.
Putting Your PyFlink Job to Work: Deployment and Monitoring
Alright, you’ve built and tested your Python streaming pipeline locally. Now for the real test: getting it into production. This is where the leap from a development sandbox to a live, operational environment happens, and it’s precisely where a managed platform like Streamkap really shines. You can skip the cluster management headaches and focus entirely on what your application is doing.
First things first, you need to package your job. A Flink cluster needs your script, of course, but it also needs to know about all the Python libraries your code depends on. The standard way to handle this is to bundle your main script and a requirements.txt file into a single zip archive. This little package contains everything Flink needs to distribute and run your code.
From Zip File to Live Pipeline
Streamkap makes the deployment process pretty straightforward. You’ll find a section in the UI specifically for deploying Flink jobs where you can upload your zip file. Once uploaded, the next step is to configure its runtime settings—essentially, telling Streamkap how much horsepower your job needs.
You’ll be tweaking a few key parameters:
- Parallelism: This is a big one. It controls how many concurrent tasks your job will be split into. Getting this right is fundamental to your job’s ability to scale.
- Memory Allocation: You’ll need to set the memory for the JobManager (the conductor of the orchestra) and the TaskManagers (the individual musicians actually doing the work).
- Checkpointing: This is your safety net. You’ll configure how often Flink saves the state of your application. It’s what allows your job to recover gracefully from failures without losing data.
Nailing these settings from the get-go is half the battle for a stable, efficient pipeline. For a deeper dive into all the knobs and levers, our managed Flink guide has you covered with best practices.
Before you hit “deploy,” it’s smart to run through a quick checklist to make sure your configuration aligns with your job’s logic and expected load. A little planning here can save a lot of headaches later.
PyFlink Deployment Considerations on Streamkap
Configuration ParameterWhat to ConfigureOptimization TipParallelismSet the number of parallel tasks for your job.Start with a number that matches your source partitions (e.g., Kafka topics). Adjust based on observed backpressure.JobManager/TaskManager MemoryAllocate sufficient JVM heap and managed memory.For Python UDFs, ensure the TaskManager has enough overhead. Monitor memory usage to avoid out-of-memory errors.Python DependenciesUpload a zip archive with your script and requirements.txt.Keep the requirements.txt lean. Unnecessary libraries add to the deployment package size and startup time.State BackendChoose between HashMap and RocksDB.Use RocksDB for very large state that won’t fit in memory. It’s slower but more resilient for massive stateful jobs.Checkpoint IntervalDefine how frequently Flink saves state snapshots.A 1-minute interval is a good starting point. Too frequent can add overhead; too infrequent increases recovery time.Connectors & CatalogsConfigure connection details for sources, sinks, and schemas.Double-check credentials and hostnames. Use Streamkap’s built-in catalog integration to simplify schema access.
Thinking through these points ensures you’re not just deploying, but deploying intelligently.
Keeping an Eye on Performance
Deployment isn’t the finish line. A running pipeline needs to be watched. The Streamkap dashboard gives you a live look at the vital signs of your PyFlink job, helping you understand its health and performance in real-time.
The one metric you absolutely must watch is backpressure. If you see high backpressure, it’s a clear signal that a part of your pipeline is struggling to keep up. A downstream task is getting data faster than it can process it, creating a bottleneck.
Monitoring backpressure isn’t just about spotting problems; it’s about proactively managing your pipeline’s capacity. A sudden spike might indicate a bottleneck in your Python UDFs or an under-provisioned sink, giving you a clear signal on where to focus your optimization efforts.
Other critical metrics to keep on your radar include:
- Latency: How long does it take for an event to get from start to finish?
- Throughput: How many records are you crunching per second?
- Checkpoint Duration and Size: If checkpoints start taking too long or getting huge, it could point to a problem with how you’re managing state.
Once your real-time PyFlink pipeline is live, ensuring it can handle the data volume efficiently is the top priority. For those looking to really dial in their setup, exploring strategies for mastering input-output throughput can offer some great techniques for managing high-velocity data streams.
Fine-Tuning Your Running Job
With your job running and metrics flowing in, you can start the optimization cycle. For instance, if you’re seeing persistent backpressure but the CPU on your TaskManagers is just coasting, that’s a classic sign you need to bump up the parallelism. Spreading the work across more tasks can often clear that bottleneck right up.
On the other hand, if your CPU is pinned at 100%, it’s time to look at your Python code. Profiling your user-defined functions (UDFs) is the next logical step to find the hot spots that are eating up cycles. Efficient state management is another area that pays huge dividends. Making sure your state size isn’t growing out of control is key to a stable, long-running application. This cycle of deploying, monitoring, and tweaking is the core loop of successfully running Apache Flink Python support with Streamkap in the wild.
Got Questions About PyFlink and Streamkap? We’ve Got Answers.
As you start blending PyFlink with Streamkap, you’re bound to have some questions. It’s only natural when you’re connecting two powerful technologies. We’ve put together answers to the most common queries we hear from developers to help you sidestep common roadblocks and get your pipelines running smoothly.
This is your go-to guide for those moments when you’re wondering, “How do I actually do…?” We’ll dig into using popular data science libraries, see how the platform handles database changes on the fly, and clarify the difference between Flink’s main APIs.
Can I Use Pandas or NumPy in My PyFlink Job on Streamkap?
Yes, you absolutely can. PyFlink was built to play nicely with the rest of the Python world, which definitely includes heavy-hitters like Pandas and NumPy. The most common way to use them is inside your user-defined functions (UDFs), where they can handle complex analysis or transformations that are just plain easier in a familiar library.
When it’s time to deploy, you just need to let Streamkap know what you’re using. The process is straightforward:
- Create a standard
requirements.txtfile listing all your third-party packages. - Bundle this file into a zip archive with your main Python script.
That’s it. Streamkap’s managed Apache Flink environment handles the rest. It automatically pushes those dependencies out to the cluster, so your UDFs can import and use libraries like Pandas for advanced data wrangling right inside your stream. No manual setup required.
How Does Streamkap Handle Schema Evolution in CDC Streams?
Schema evolution is a fact of life for any real-world database, and Streamkap is designed specifically for this. It tackles this challenge using a central Schema Registry to manage the Avro schemas for all your Change Data Capture (CDC) streams.
When something changes in your source database—say, a new column gets added—Streamkap detects it instantly and registers a new, compatible version of the schema. Your PyFlink job, as long as it’s set up to read the Avro format, can usually adapt to these backward-compatible changes without missing a beat.
This automated schema management is a huge operational win. It saves you from the classic headache of streaming jobs crashing because of unexpected schema drift—a notoriously tricky problem in pipelines you have to manage yourself.
What Is the Difference Between the DataStream API and Table API?
The choice between the DataStream API and the Table API isn’t about which one is “better.” It’s about picking the right tool for the job at hand.
- DataStream API: Think of this as your low-level, high-control option. It’s perfect when you need to handle complex event logic, manage custom state, or do anything that requires you to process data one event at a time. It feels a lot like classic, imperative programming.
- Table API & SQL: This is your high-level, declarative power tool. It shines for most data transformation, filtering, and aggregation tasks that you can express with SQL-like logic. It’s often much quicker to write, and Flink’s query optimizer can do a fantastic job with it, making it the default choice for most ETL and analytics work.
A good rule of thumb for many projects is to start with the Table API. It’s more concise and often more performant. If you find yourself needing more granular control over state or time, you can always drop down to the DataStream API.
Ready to build your own real-time data pipelines with zero operational overhead? Streamkap provides a fully managed Kafka and Flink platform, allowing your team to focus on building value, not managing infrastructure. Get started with a free trial today!