How to Stream DynamoDB to Databricks with Streamkap
Paul Dudley
May 28, 2025
TL;DR
• Stream DynamoDB to Databricks in minutes using Streamkap's intuitive data streaming platform. • NoSQL databases like DynamoDB present unique ingestion challenges-Streamkap handles them with high-performance CDC. • This guide covers DynamoDB table setup, Databricks configuration, and pipeline creation for fast, reliable data movement.
Introduction
Modern data practitioners face an increasingly complex challenge: ingesting data from diverse sources into multiple destinations at high velocity. As NoSQL databases have surged in popularity, teams struggle with fast, reliable data movement from these operational stores to analytics platforms. Traditional ETL tools often fall short when dealing with the unique characteristics and scale requirements of NoSQL systems.
That’s where Streamkap comes in, a powerful and intuitive data streaming tool that enables teams to move their data in minutes.
In this guide, we’ll walk through how to use Streamkap to stream data from AWS DynamoDB, one of the most popular NoSQL databases, to Databricks, one of the market’s most powerful data platforms.
| Prerequisites | You’ll need accounts for AWS, Databricks, and Streamkap. |
|---|---|
| Creating a New DynamoDB Table from Scratch | This section will guide you through setting up a new DynamoDB table for Streamkap compatibility. |
| Setting up a New Databricks Account from Scratch | This section will guide you through creating a new Databricks workspace and collecting connection information for it to be a Streamkap destination. |
| Fetching Credentials from an Existing Databricks Environment | This section will guide you through collecting connection information for an existing Databricks workspace to be a Streamkap destination. |
| Using Streamkap to Stream Data | Using Streamkap to create a data pipeline by connecting AWS DynamoDB as the source and Databricks as the destination. |
Prerequisites
Make sure you have the following ready so you can follow this guide:
1. Streamkap Account: You must have an active Streamkap account with admin or data admin rights. If you don’t have one yet; sign up here.
2. Databricks Account: Ensure you have an active Databricks account with admin privileges. If you don’t have one yet, you can sign up here.
3. Amazon AWS Account: To create, or modify an AWS DynamoDB instance, you need an active Amazon AWS account with networking and DynamoDB permissions. If you don’t already have one, you can sign up here.
Setting Up AWS DynamoDB for Streamkap Compatibility
AWS DynamoDB is one of the most widely used NoSQL database services, known for its scalability, high availability, and low-latency performance. Its ease of use and flexibility make it a go-to solution for handling large amounts of semi-structured data in production environments. Setting up a DynamoDB instance is quick and straightforward, allowing new users to get started in minutes. If you already have an existing DynamoDB instance, configuring it for integration with Streamkap is a smooth process.
In the following sections we will walk through both creating a new DynamoDB instance and configuring it for compatibility with Streamkap, and configuring an existing DynamoDB instance for compatibility with Streamkap.
Creating a New DynamoDB Table from Scratch
Note: To create and manage a DynamoDB table compatible with Streamkap, you must have IAM permissions to manage DynamoDB tables, streams, item operations, backups, point-in-time recovery, and S3 exports.
If your permissions are limited, please contact your AWS administrator to request the necessary DynamoDB, S3, and IAM permissions for managing DynamoDB tables and their associated features required for Streamkap integration. An alternative option is testing out Streamkap on a personal AWS account.
Step 1: Log in to the AWS Management Console
- Log in to the AWS Management Console and type “DynamoDB” in the search bar.
- Click on “DynamoDB” as shown below

Step 2: Create a new DynamoDB Table
- Once you are in the DynamoDB section navigate to Dashboard orTables on the left side navigation menu.

- Choose a region that Streamkap is available in to host your DynamoDB Table.
Note: Streamkap is available in the following regions:
- Oregon (us-west-2)
- North Virginia (us-east-1)
- Europe Ireland (eu-west-1)
- Asia Pacific - Sydney (ap-southeast-2)

- Once you have selected the region, click on the Create Table button as shown below.

- In the Table Details field, enter a name of your choice (e.g., MusicCollection). Set the Partition Key (e.g., Artist) and Sort Key (e.g., Song Title) according to your preference, specify their Type as String, and leave the remaining table settings as default. Finally, click Create table.

- After creating the table, wait until its status changes to Active. Once active, click on the MusicCollection table to continue.

Step 3: Configuring Your DynamoDB Table for Streamkap Compatibility
- Click on the created table, then populate some table items by clicking ‘Create item’ and adding values.


For the purposes of this guide, the values of Ed Sheeran - Shape of You, Taylor Swift – Love Story and The Beatles – Let It Be, have been populated on the DynamoDB table.
- Once you’ve entered some table items into the table, navigate to the Export and Streams section.
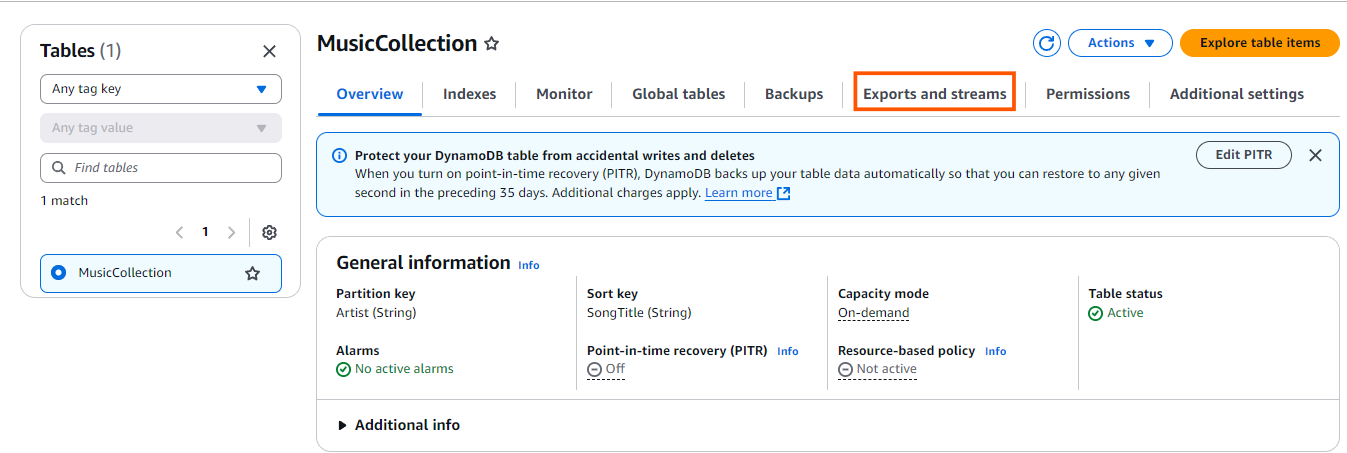
- Turn on the Dynamodb stream details.

- Select New and Old Images on the DynamoDB Streams setting to capture both the updated and previous versions of the items in your table. This ensures that any changes made to the data are fully captured.

- Navigate to the Backups section and click on Point-in-Time Recovery (PITR) Edit button to enable continuous backups for your DynamoDB table. This enables point-in-time recovery to maintain a continuous backup of your table, allowing you to restore data to any moment within the retention window.

- Check Turn on Point-in-Time Recovery and click Save changes to enable the feature for your DynamoDB table.

Note: If you have multiple tables and want all of them to be compatible with Streamkap, you will need to repeat the above process for each table.
Step 4: Create a S3 bucket
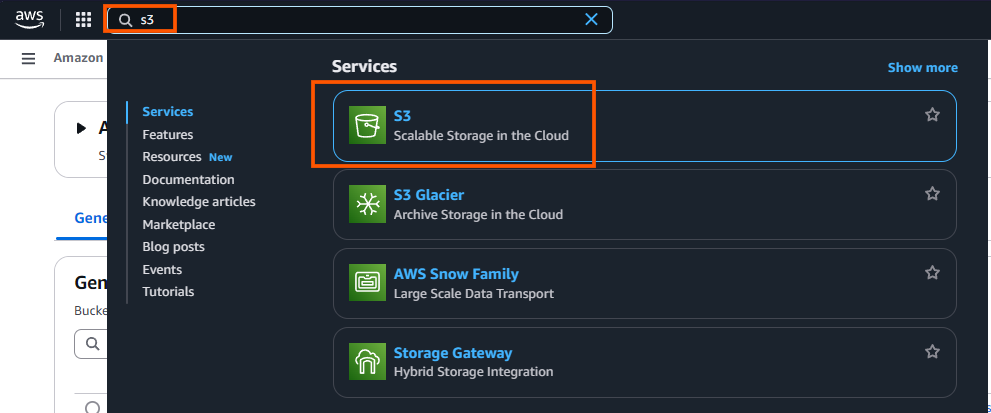
- On the AWS Management Console type “S3” in the search bar.
- Click on “S3” as shown below.
- While you can use an existing S3 bucket for Streamkap integration, creating a new dedicated new bucket is recommended. This approach helps organize and isolate your Streamkap data streams.

- Set the bucket type as General purpose. Type in a bucket name (e.g. source-dynamodb-bucket).
- Additionally, make sure to disable ACLs (Access Control Lists) under the Object Ownership section. This ensures that the S3 bucket uses the bucket owner’s permissions and simplifies access management.

- Block all public access as it ensures that your S3 bucket and its contents are secure and not accessible to unauthorized users.
- Enable versioning for the S3 bucket to preserve, retrieve, and restore every version of an object in the bucket. This is particularly useful for maintaining historical data, allowing you to recover accidental deletions or overwrites.

- Select SSE-S3 (Server-Side Encryption with Amazon S3-managed keys) to automatically encrypt your data at rest. This ensures that all objects stored in your S3 bucket are securely encrypted without the need to manage encryption keys.
- Disable the bucket key for SSE-S3, as it is not necessary when using Amazon S3-managed keys. Disabling it simplifies the encryption process while still ensuring your data is securely encrypted.

- Finally, click Create bucket to complete the S3 bucket set up.

Step 5: Create IAM User and Policy for Streamkap Compatibility
- On the AWS Management Console type “IAM” in the search bar.
- Click on “IAM” as shown below

- After clicking on IAM, navigate to the Policies section.
- Click Create Policy to start creating a new IAM policy for DynamoDB and S3 access.

- Select JSON as the policy editor

- To create the IAM policy, use the following configuration. Make sure to replace TableName, AccountID,Region and S3 bucket name with your configured values.

- Policy Name: source-dynamodb-bucket-policy
- Description: This policy will be used to configure DynamoDB as a source to Streamkap.

- Click Create policy

- Navigate to Users on the left-hand side menu in the IAM dashboard.
- Click on Create user to start the process of adding a new IAM user.

- Type in a username of your choice.
- Leave the option Provide user access to the AWS Management Console unchecked, as the user will only need programmatic access (via access keys) to interact with DynamoDB and S3 for Streamkap integration.

- In the Permissions options, select Attach policies directly.
- From the dropdown, select Customer managed policies.
- Find and select the source-dynamodb-bucket-policy policy you created earlier.
- After selecting the policy, click Next to proceed.

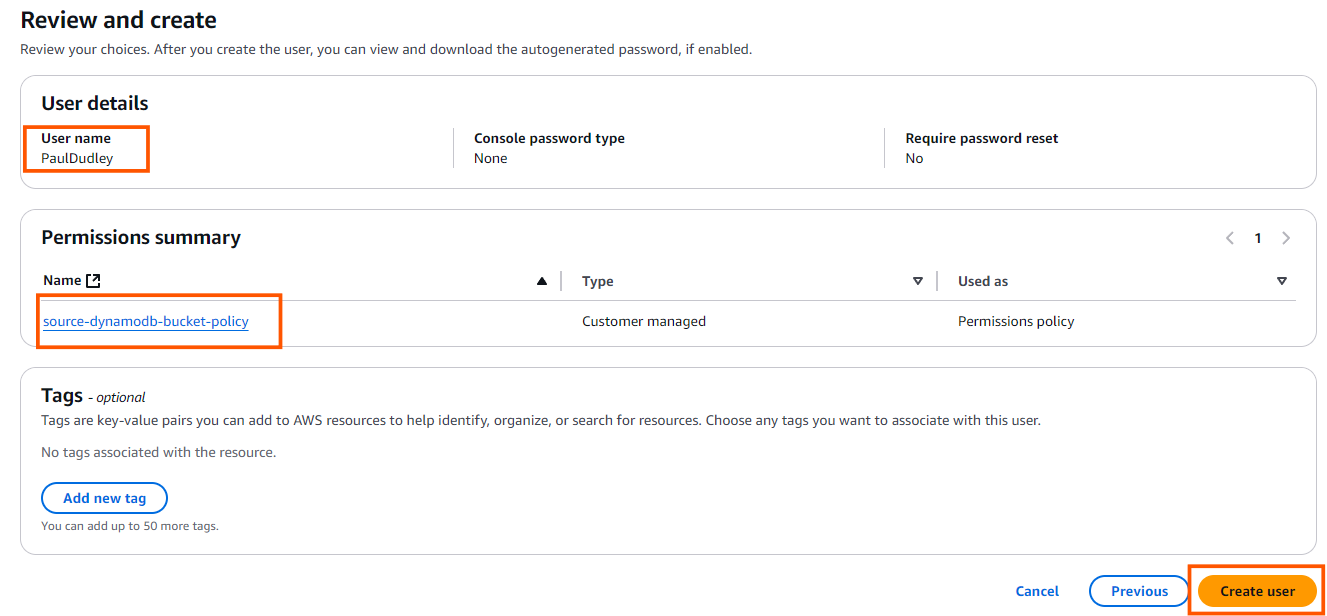
- Review the username and attached source-dynamodb-bucket-policy, then click Create user to finalize the process.
- In the Users section, click on the username that you just created to create access key.

- Click Create access key.

- Select Third-party-service.
- Click Next.

- Type in your description, e.g. This is the access key we will use to configure Streamkap

- Download the credentials .csv file for future reference and click on Done to complete the process.

Configuring an Existing DynamoDB Table for Streamkap Compatibility
Step 1: Configuring Your DynamoDB Table for Streamkap Compatibility
- Click on the table (e.g MusicCollection) you would like to configure for Streamkap compatibility.
- Once you’ve chosen the table, navigate to the Export and Streams section to proceed with the next step.
- Turn on the Dynamodb stream details.
- Select New and Old Images on the DynamoDB Streams setting to capture both the updated and previous versions of the items in your table. This ensures that any changes made to the data are fully captured.
- Navigate to the Backups section and click on Point-in-Time Recovery (PITR) Edit button to enable continuous backups for your DynamoDB table. This enables point-in-time recovery to maintain a continuous backup of your table, allowing you to restore data to any moment within the retention window.
- Check Turn on Point-in-Time Recovery and click Save Changes to enable the feature for your DynamoDB table.
Note: If you have multiple tables and want all of them to be compatible with Streamkap, you will need to repeat the above process for each table.
Step 2: Create an S3 bucket
- Navigate to the AWS Management Console and type “S3” in the search bar.
- Click on “S3” as shown below.
- While you can use an existing S3 bucket for Streamkap integration, creating a dedicated new bucket is recommended. This approach helps organize and isolate your Streamkap data streams.
- Choose the bucket type as General. Type in a bucket name (source-dynamodb-bucket).
- Additionally, make sure to disable ACLs (Access Control Lists) under the Object Ownership section. This ensures that the S3 bucket uses the bucket owner’s permissions and simplifies access management.
- Block all public access because it ensures that your S3 bucket and its contents are secure and not accessible to unauthorized users. This security best practice ensures your bucket, and its contents remain private and accessible only to authorized users.
- Enable versioning for the S3 bucket to preserve, retrieve, and restore every version of an object in the bucket. This is particularly useful for maintaining historical data, allowing you to recover accidental deletions or overwrites.
- Select SSE-S3 (Server-Side Encryption with Amazon S3-managed keys) to automatically encrypt your data at rest. This ensures that all objects stored in your S3 bucket are securely encrypted without the need to manage encryption keys.
- Disable the bucket key for SSE-S3, as it is not necessary when using Amazon S3-managed keys. Disabling it simplifies the encryption process while still ensuring your data is securely encrypted.
Step 3: Create IAM User and Policy for Streamkap Compatibility
- Navigate to the AWS Management Console and type “IAM” in the search bar.
- Click on “IAM” as shown below
- After clicking on IAM, navigate to the Policies section.
- Click Create Policy to start creating a new IAM policy for DynamoDB and S3 access
To create the IAM policy, use the following configuration. Make sure to replace TableName, AccountID and Region and S3 bucket name with your configured values.
- Policy Name: source-dynamodb-bucket-policy
- Description: This policy will be used to configure DynamoDB as a source for Streamkap.
- Navigate to Users on the left-hand menu in the IAM dashboard.
- Click on Create user to start the process of adding a new IAM user.
- Plug in a username of your choice.
- Leave the option Provide user access to the AWS Management Console unchecked, as the user will only need programmatic access (via access keys) to interact with DynamoDB and S3 for Streamkap integration.
- In the Permissions options, select Attach policies directly.
- From the dropdown, select Customer managed policies.
- Find and select the source-dynamodb-bucket-policy policy you created earlier.
- After selecting the policy, click Next to proceed.
- Review the username and attached source-dynamodb-bucket-policy, then click Create user to finalize the process.
- In the Users section, click on the username that you just created to create access key.
- Click Create access key.
- Select Third-party-service.
- Click Next.
- Type in your description

- Download the credentials .csv file for future reference and click on Done to complete the process.
Configuring Databricks for Streamkap Compatibility
Databricks is a unified data platform that combines ETL (Extract, Transform, Load) workflows, job orchestration, data governance, and AI capabilities in a single environment. As one of the market’s leading data platform providers, Databricks offers an intuitive interface that serves the entire data team, from data engineers and scientists to business analysts.
The platform’s flexibility makes it an ideal destination for streaming data from operational systems like DynamoDB. The following sections have instructions for creating a new account or utilizing your existing credentials, ensuring a seamless and efficient streaming process.
Setting up a New Databricks Account from Scratch
Step 1: Sign up and create a Databricks account
- Visit Databricks’ website and click on Try Databricks.

- Fill in the requested details and create a Databricks account.

- When you log in to the account created a few seconds ago you will land on the Account console page that looks like the following.

Step 2: Create a new Databricks Workspace
The onboarding process in Databricks differs between the trial version and the paid version. Based on your payment plan with Databricks, please follow either step 2a or 2b.
Step 2a: Databricks Trail Version Flow
In the trial version, you will land on the following page. Click + New -> More->SQL warehouse.

You will land on a page that looks like the following.

Please skip to Step 3: Create a new SQL Data Warehouse in order to create a new data warehouse for Streamkap streaming.
Step 2b: Databricks Paid Version Flow
If you have the Databricks paid version, please follow the steps shown below.
- Click on Workspaces.

- Then click on Create workspace on the top right corner of the screen. A page like the one presented below should appear

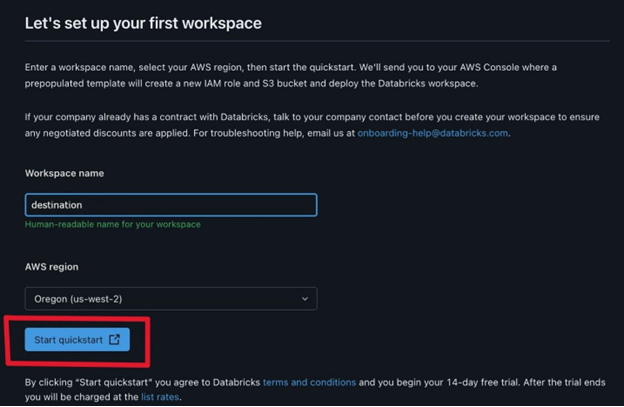
- Choose Quickstart (Recommended) and click next. Fill the workspace name. Choose your desired region and click Start Quickstart.
- Databricks will take you to your AWS console. Scroll down and Click Create stack.

- After a few minutes, return to your Databricks Workspaces and it will be ready, as illustrated below. On your Databricks workspace page click on Open and you will be taken to your new data warehouse.

Step 3: Create a new SQL Data warehouse
- On the SQL Warehouses tab click Create SQL warehouse

- Type your new SQL warehouse details. For this guide we recommend you use the minimum available cluster size, which is 2X-Small, to reduce cost.
- Click Create and within seconds your new data warehouse will be up and running.

Step 4: Fetch credentials from your new data warehouse
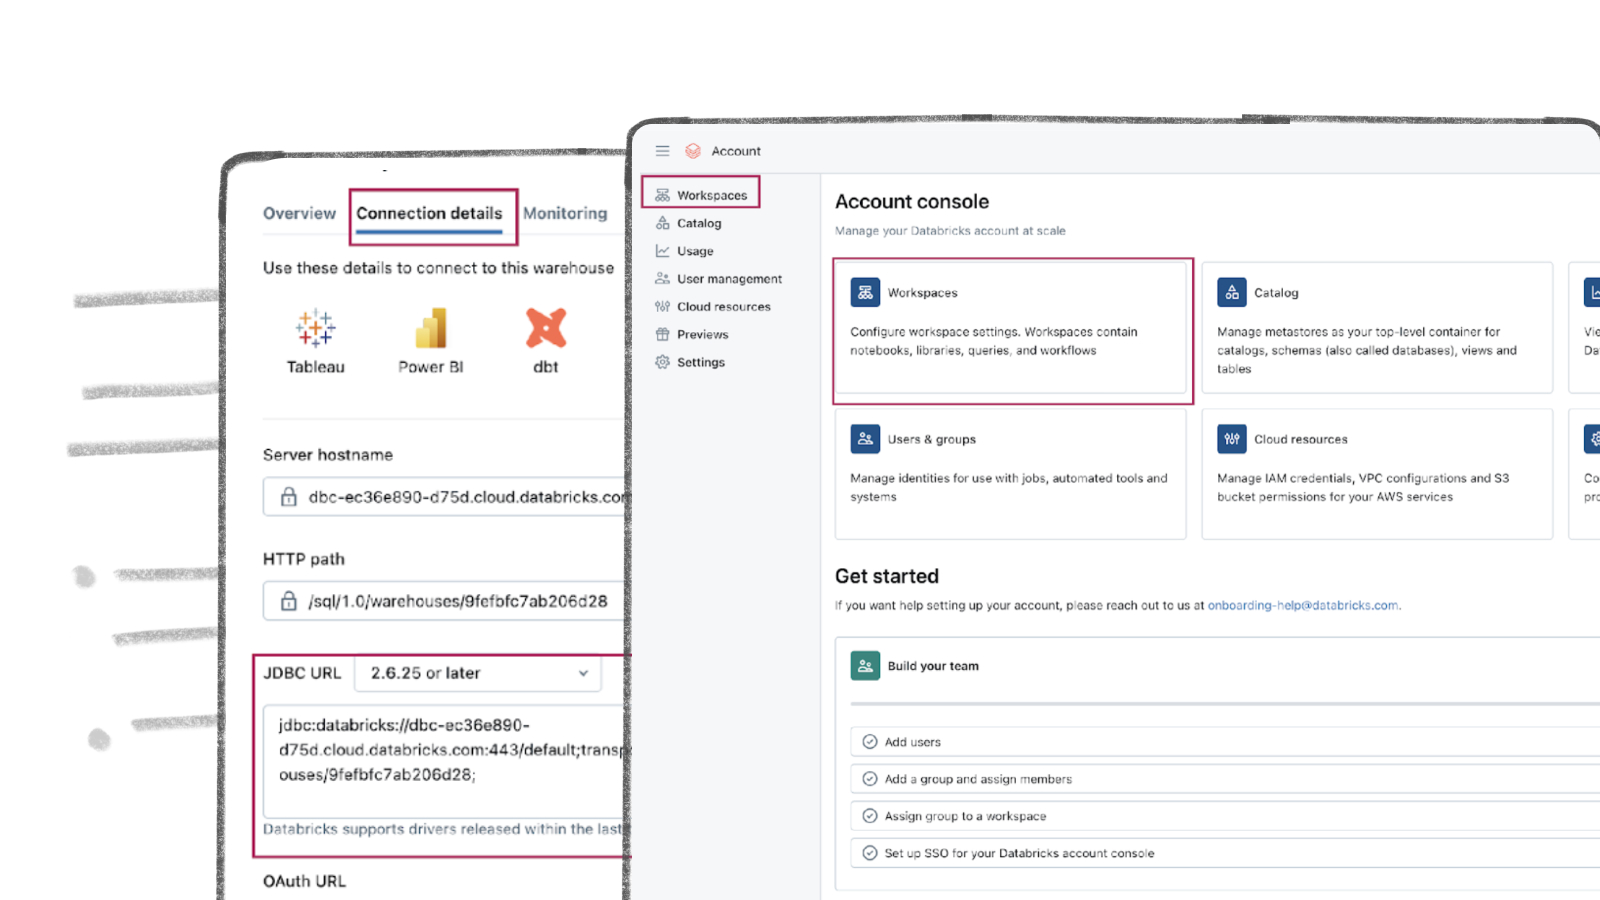
- On your new data warehouse click on the Connection details tab as presented in the following illustration.

- Copy the JDBC URL into a secure place.
- Create apersonal access token from the top right corner of the screen and store it in a secure place.
- We will need the JDBC URL and personal access token later in this guide to connect Databricks to Streamkap as a destination.
Fetching Credentials from an Existing Databricks Environment
Step 1: Log in to Your Databricks Account
- Navigate to the Databricks login page.
- Plug in your email and hit “Continue”. A six-digit verification code will be sent to your email address.
- Type in the six-digit verification code and you will land in the Account Console page that looks like the following

Step 2: Navigate to your Databricks Warehouse
- Click on Workspaces and then click on Open button next to the corresponding workspace as illustrated below.

- Once you land on your desired workspace, click on SQL Warehouses. This will list your SQL warehouses as outlined below.

Step 3: Fetch Credentials from your Existing Data Warehouse
- Choose the data warehouse you wish to fetch credentials from. Click on the Connection details tab as presented in the following illustration.

- Copy the JDBC URL into a secure place.
- Create a personal access token from the top right corner of the screen and store it in a secure place.
- We will need the JDBC URL and personal access token later in this guide to connect Databricks to Streamkap as a destination.

Note: If you cannot access the data warehouse or create a personal access token, you may have insufficient permissions. Please contact your administrator to request the necessary access.
Using Streamkap to Stream Data
Streamkap creates fast, reliable data pipelines for real-time analysis and response to large data volumes. This allows your team to make quick, informed decisions, keeping you competitive. For optimizing operations, enhancing business intelligence, or improving customer experiences, ensuring efficient and secure data flow is essential.
Step 1: Adding an AWS DynamoDB source connector
If the above steps were followed as described, your AWS DynamoDB Table should be Streamkap compatible.
Note: You must have admin or data admin privileges to continue with the following steps.
- Log in to Streamkap.

On the left side navigation pane
- Click on Connectors
- Click on the Sources tab
- click the + Add button
- Enter DynamoDB in the search bar and select it from the list of available services, as depicted in the image below

- Populate the DynamoDB connection with a name, your selected AWS region, your AWS Access Key and AWS Secret Key (which can be found in the accessKeys.csv you generated earlier), and your S3 bucket name. Click Next to proceed.

- Type your DyamoDB table name as your source schema. Click Save.

Step 2: Adding an AWS DynamoDB destination connector
- Click Connectors on the panel, click Destinations and click Add

- Search for and click Databricks

- Populate the Databricks connection with a name, toggle on the Delete Mode, enter your personal access token (which was copied during the Databricks workspace set up), and your workspace JDBC connection url, and ensure that the schema is set to ‘streamkap’. Click Save to proceed.

Step 3: Create a Streamkap pipeline between DynamoDB and Databricks
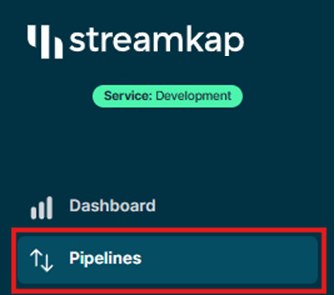
- Click Pipelines on the left panel
- Click Create, add your DynamoDB source and Databricks destination connectors. Click Next to proceed.


- Click the checkbox for your tables to stream, e.g. MusicCollection. Click Next to proceed.

- Review your Pipeline Name, click Save to create your pipeline.

Step 5: Review streamed data in Databricks
- From the Databricks workspace home page, click SQL Editor, your workspace streamkap schema should have a new table named after your source table e.g. musiccollection

- Click the menu on your table and click Preview in new tab, this should provide a preview of your streamed in data


By design Your “Table” in the destination will have the following meta columns apart from the regular columns.
| Column Name | Description |
|---|---|
| _STREAMKAP_SOURCE_TS_MS | Timestamp in milliseconds for the event within the source log |
| _STREAMKAP_TS_MS | Timestamp in milliseconds for the event once Streamkap receives it |
| __DELETED | Indicates whether this event/row has been deleted at source |
| _STREAMKAP_OFFSET | This is an offset value in relation to the logs we process. It can be useful in the debugging of any issues that may arise |
What’s Next?
Thank you for reading this guide. If you have other sources and destinations to connect to in near real-time, check out the following guides.
For more information on connectors please visit here.
Paul Dudley
LinkedInAuthor Bio
Paul is the CEO and Co-Founder of Streamkap
Published
May 28, 2025
TL;DR
• Stream DynamoDB to Databricks in minutes using Streamkap's intuitive data streaming platform. • NoSQL databases like DynamoDB present unique ingestion challenges-Streamkap handles them with high-performance CDC. • This guide covers DynamoDB table setup, Databricks configuration, and pipeline creation for fast, reliable data movement.
Related blog posts
.png)
Why Apache Iceberg? A Guide to Real-Time Data Lakes in 2025
Apache Iceberg brings SQL tables to cloud storage with ACID transactions and time travel. Learn why it's essential for 2025.
AWS RDS PostgreSQL Set Up
AWS RDS PostgreSQL stands out as one of the most widely used production databases. Its global adoption and everyday usage have prompted Amazon to make it exceptionally user-friendly. New users can set up an RDS PostgreSQL instance from scratch in just a few minutes.
Databricks Warehouse Set Up
Getting started with Databricks is a breeze, regardless of your experience level. This guide provides clear instructions on how to create a new account or use your existing credentials, ensuring a smooth and efficient streaming process.