<--- Back to all resources
Change data capture with ssh tunnels and port forwarding
Discover how to implement change data capture with ssh tunnels and port forwarding for secure, scalable data replication.
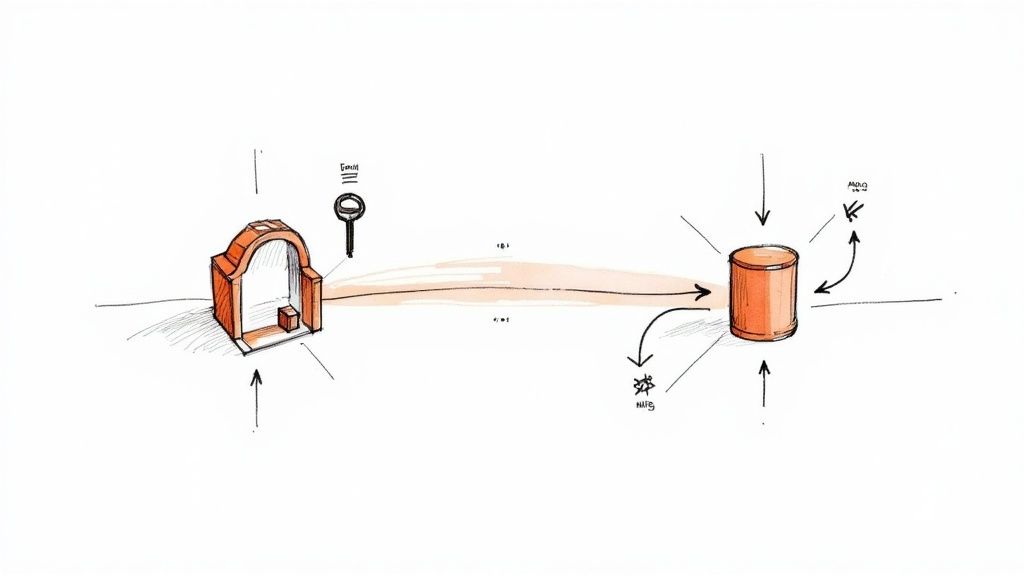
Getting your Change Data Capture (CDC) pipeline to talk to a database locked down behind a firewall is a classic data engineering headache. The most elegant solution I’ve found over the years combines change data capture with SSH tunnels and port forwarding. This setup creates a secure, encrypted pathway for your data streams without begging the network team for complex firewall changes.
Essentially, it tricks your CDC tools into thinking they’re connecting to a database running on their local network.
Securely Stream Data from Private Networks
As a data engineer, I’ve lost count of how many times I’ve needed to pull data from a production database tucked away in a private VPC or an on-prem data center. Network security folks are, quite rightly, very reluctant to poke holes in the firewall for external services. This is where SSH tunnels become your best friend.
Instead of trying to expose the database directly, you establish an encrypted SSH connection to an intermediary server inside the private network. This is usually a hardened bastion host that’s already approved for external access. Your CDC tool then connects to a port on its local machine, and the SSH client transparently forwards all that traffic through the encrypted tunnel, straight to the target database.
Why This Architecture Works So Well
This approach cleanly decouples network security concerns from your data integration workflow. The security team only has to worry about managing SSH access (typically just port 22) to a single, hardened machine—a well-understood and secure practice.
Meanwhile, the data team can point their tools, whether it’s Debezium or a managed service like Streamkap, to localhost. This massively simplifies connector configurations and sidesteps the whole mess of direct network routing.
I’ve used this pattern countless times, and it consistently delivers on several fronts. Here’s a quick breakdown of why it’s so effective.
Why Use SSH Tunnels for CDC
BenefitTechnical ImpactBusiness OutcomeEnhanced SecurityAll data is encrypted end-to-end by the SSH protocol, protecting sensitive information in transit.Reduces the risk of data breaches and helps meet compliance requirements (e.g., GDPR, HIPAA).Simplified NetworkingAvoids complex firewall rules, VPNs, or VPC peering. The only requirement is SSH access to one bastion host.Faster project delivery and lower operational overhead for network and security teams.Improved FlexibilityThe tunnel works at the TCP level, so it’s completely database-agnostic. Use it for PostgreSQL, MySQL, MongoDB, etc.A single, reusable pattern can be applied across your entire data stack, regardless of the underlying database technology.
The real magic here is that your CDC connector genuinely thinks it’s talking to a local database. The SSH client does all the heavy lifting, managing the secure connection across network boundaries. It’s a beautifully clean and reliable solution.
And the need for this kind of secure, real-time data movement is only getting bigger. The market for CDC tools is exploding, with some analysts predicting the segment for live data warehousing to blow past $3 billion by 2025. This growth just underscores how critical it is to have reliable methods like SSH tunneling to connect isolated legacy systems with modern cloud platforms. You can dig into the numbers yourself in a recent CDC market analysis.
Now, let’s get into the practical steps to actually build this bridge.
Understanding SSH Tunneling for Data Pipelines
Before you even think about configuring a connector, you have to get your head around how SSH tunneling actually works. It’s best to think of an SSH tunnel as a secure, encrypted pipe that snakes network traffic from one point to another, neatly bypassing firewalls and tricky network rules. This trick is essential for change data capture with SSH tunnels and port forwarding, as it lets your CDC tool talk to a protected database as if it were sitting right on the same local network.
This isn’t some new-fangled technique; SSH has been the bedrock of secure remote connections for decades. Since its creation, its adoption has been massive. By the end of 1995, SSH already had 20,000 users across fifty countries. Today, its port forwarding capability is a standard tool in any engineer’s toolkit for safely exposing internal services, like databases, for critical work. You can get the full history and protocol deep dive from resources on Secure Shell.
At the heart of this strategy are two fundamental approaches: local port forwarding and reverse port forwarding. Picking the right one boils down to your network architecture and which machine needs to kick off the connection.
Local Port Forwarding: Your Go-To Method
Most of the time, you’ll find yourself using local port forwarding for CDC pipelines. This is the classic setup where your CDC tool (say, Debezium running in a Kafka Connect cluster) lives outside the private network and needs to punch a hole in to reach a database locked away inside.
Here’s a practical look at how it works:
- Kick off the connection: From a machine that can talk to your CDC tool (often a bastion host, which we’ll cover later), you’ll run a specific SSH command.
- Bind a local port: This command tells your local SSH client to start listening on a port, for example,
localhost:5433. - Forward the traffic: Now, any data sent to
localhost:5433gets automatically and securely shuttled through the SSH tunnel, straight to the target database’s IP and port inside the private network.
With the tunnel up, you can configure your CDC connector to simply point to localhost:5433. The SSH client does all the heavy lifting in the background, encrypting and redirecting everything automatically. For a refresher on what CDC is all about, check out our guide on what is change data capture.
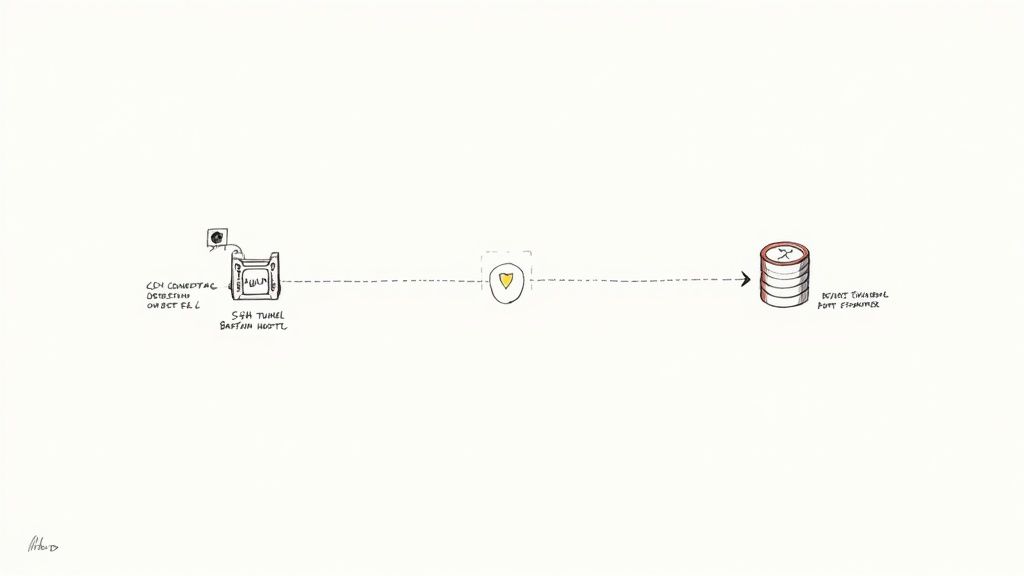
The diagram below gives you a great visual of how both local and reverse forwarding create these secure pathways.
You can see how the client machine binds a local port, and the SSH connection then forwards that traffic to the destination server, effectively building a secure tunnel right through the firewall.
When to Use Reverse Port Forwarding
Reverse port forwarding is the clever solution for a much tougher problem. You’ll need it when the firewalled machine—where the database lives—has to initiate the connection out to your CDC platform. This is a common situation in corporate environments with strict “egress-only” firewall rules or when your source database is stuck behind a carrier-grade NAT without a public IP.
In this scenario, the roles are flipped:
- The SSH client is running on the database server itself (or a nearby machine inside the private network).
- It reaches out to an SSH server located where your CDC tool is running.
- The connection instructs the remote SSH server to listen on a port, which then forwards traffic back through the established tunnel to the database.
Key Takeaway: Local forwarding is for connecting in to a private network from the outside. Reverse forwarding is for punching out from a private network to an external service. Your network topology dictates the right move.
The Bastion Host: A Security Linchpin
In almost any real-world production setup, you’ll never connect directly to a database server over SSH from the internet. That’s a huge security risk. Instead, you’ll use a bastion host, sometimes called a jump box. This is a dedicated, hardened server that sits on the edge of your private network, acting as the single, secure gateway.
Using a bastion host is a non-negotiable security practice because it dramatically shrinks your network’s attack surface. You only have to expose one port—the SSH port 22—on this single, heavily monitored machine. All your data pipeline tunnels are then established through this secure gateway, which keeps your precious database servers completely shielded from direct internet exposure.
Getting Hands-On with Local and Reverse Port Forwarding
Alright, let’s move from theory to the command line. When you’re wrestling with change data capture, SSH tunnels, and port forwarding, getting the syntax right is everything. This is where we’ll walk through the exact, ready-to-use SSH commands and CDC configurations you’ll need for the most common data pipeline headaches.
The diagram below maps out how a CDC tool, whether it’s running on your laptop or in the cloud, can securely punch through a firewall. It uses a bastion host to reach a database tucked away in a private network, all thanks to local forwarding.
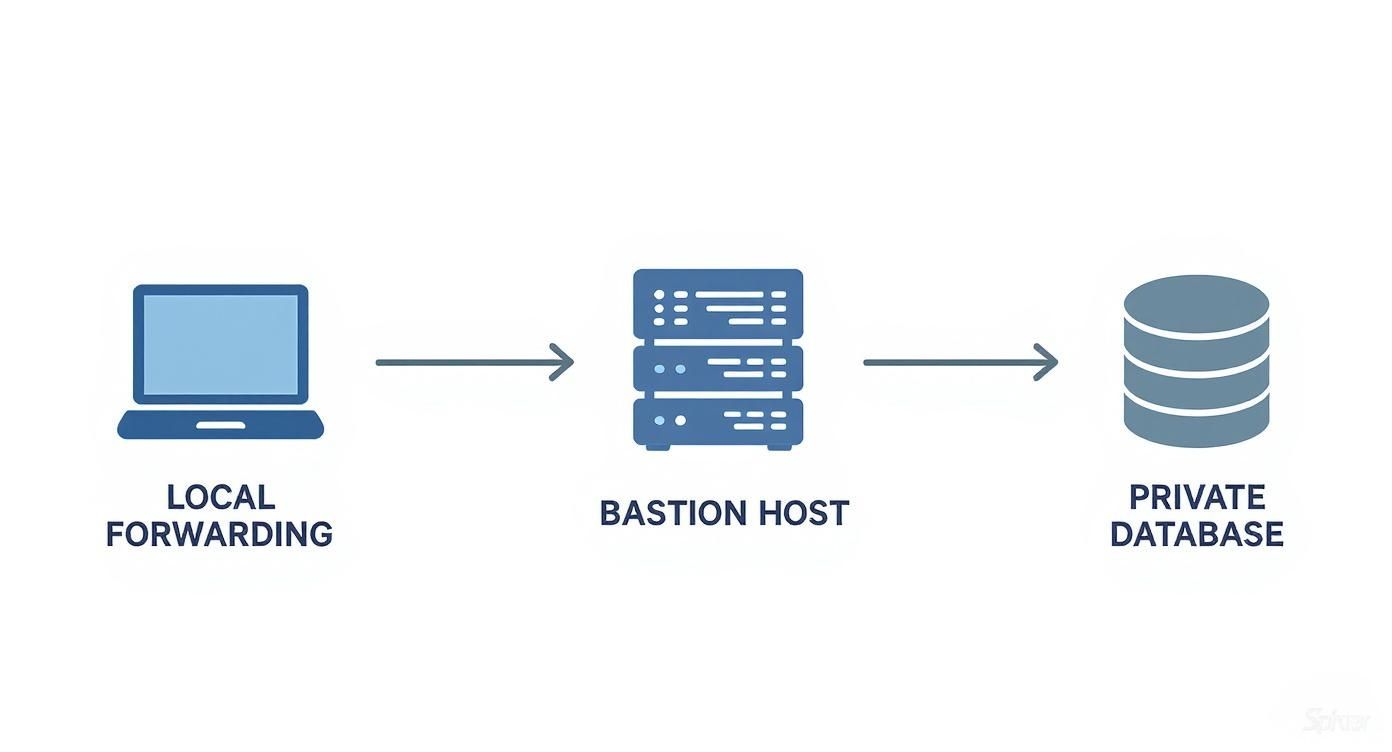
This visual gives you a clear picture of the data’s journey: from your local machine, through the encrypted SSH tunnel via the bastion, and finally landing safely at the private database.
Local Port Forwarding: The Workhorse for Inbound Connections
Local forwarding is the tool you’ll reach for most often. Let’s say you have a Debezium connector running in a cloud Kafka Connect cluster. Your target is a PostgreSQL database sitting inside a private VPC, completely inaccessible from the outside world. Your connector can’t see the database, but it can reach a bastion host at bastion.example.com.
This is the classic scenario for local forwarding. You’ll start the tunnel from a machine that your Kafka Connect cluster can access. To keep things simple, let’s assume you’re running this command right on the Kafka Connect worker node itself.
ssh -N -L 5433:private-db-host:5432 cdcuser@bastion.example.com
Let’s quickly unpack that command:
-N: This is a critical flag. It tells SSH, “Just open the tunnel, don’t execute any remote commands.” It’s perfect for pure port forwarding.-L 5433:private-db-host:5432: This is the magic. It binds port 5433 on your local machine and forwards any traffic that hits it over toprivate-db-hoston port 5432, all through the secure SSH connection.cdcuser@bastion.example.com: This is simply the user and hostname for your bastion host.
Once that tunnel is active, your Kafka Connect worker now has a local listener on port 5433. Anything sent there gets securely piped to the remote PostgreSQL database. For a deeper dive on getting the database ready for this, our guide on PostgreSQL change data capture has all the details.
The beautiful part is how simple your Debezium configuration becomes. You don’t have to deal with complex private DNS names or firewall rules in the connector config; you just point it to localhost.
{“name”: “postgres-source-connector”,“config”: {“connector.class”: “io.debezium.connector.postgresql.PostgresConnector”,“tasks.max”: “1”,“database.hostname”: “localhost”,“database.port”: “5433”,“database.user”: “debezium_user”,“database.password”: “your_password”,“database.dbname”: “inventory”,“database.server.name”: “fulfillment”,“plugin.name”: “pgoutput”}}
See that? database.hostname is localhost and database.port is 5433. As far as the connector is concerned, the database is running locally. The SSH tunnel handles all the networking gymnastics behind the scenes.
Reverse Port Forwarding: Escaping Egress-Only Networks
Reverse forwarding is your escape hatch for trickier network topologies, especially when the source database is locked down in a network that blocks all inbound connections. In this setup, a machine inside the private network has to “phone home” by initiating an outbound connection to a server where your CDC tool is listening.
Imagine your CDC agent lives on a server at cdc-ingest.example.com and is waiting for a connection from your database. You’ll run the following command from a machine inside the private network (we’ll call it db-proxy):
ssh -N -R 15432:private-db-host:5432 cdcuser@cdc-ingest.example.com
Let’s break down this reverse tunnel command:
-R 15432:private-db-host:5432: The-Rflag is what makes it a reverse tunnel. It tells the remote server (cdc-ingest.example.com) to listen on port 15432. Any traffic hitting that remote port is sent back through the tunnel toprivate-db-hoston port 5432.
Now, your CDC tool on cdc-ingest.example.com simply connects to localhost:15432 to reach the database, even though the database’s network was the one to initiate the connection. It’s a clever reversal of the typical client-server flow.
Pro Tip: When setting up a reverse tunnel, you might need to enable GatewayPorts yes in the sshd_config file on the remote server (cdc-ingest.example.com). This allows other machines on that network to use the forwarded port, not just processes running on localhost. This is incredibly useful if your CDC tool and SSH endpoint are on different machines in the same network.
Choosing Between Local and Reverse SSH Tunnels
Deciding which tunnel to use comes down to one key question: which machine is allowed to initiate the connection? The table below breaks down common scenarios to help you choose the right approach for your CDC architecture.
ScenarioRecommended Tunnel TypeSSH Command Example SnippetCDC Tool Connection HostCloud CDC tool (e.g., Kafka Connect) needs to access an on-premise database.Local Forwardingssh -N -L 5433:db:5432 user@bastionlocalhost:5433Analyst on a corporate laptop needs temporary, secure access to a production database.Local Forwardingssh -N -L 8000:db:5432 user@bastionlocalhost:8000Database in a highly restricted network that only allows outbound traffic.Reverse Forwardingssh -N -R 15432:db:5432 user@cdc_hostlocalhost:15432IoT device behind a NAT firewall needs to send data back to a central server.Reverse Forwardingssh -N -R 2222:localhost:22 user@serverlocalhost:2222
Ultimately, local forwarding is for “pulling” data through a firewall, while reverse forwarding is for “pushing” a connection path out from behind one.
Mastering both of these techniques is a huge advantage for any data engineer. The demand for secure, real-time data integration is only growing, with the global market projected to jump from $17.58 billion in 2025 to $33.24 billion by 2030. This rapid growth underscores just how critical reliable methods like SSH tunneling are for bridging the gap between on-premise and cloud systems. By knowing when and how to use local and reverse forwarding, you’ll be ready to tackle just about any network constraint that comes your way.
Creating Production-Ready, Resilient Tunnels
A manually triggered SSH tunnel is fine for a quick test or a one-off data pull. But for a production CDC pipeline that needs to run 24/7, that single, fragile session is a ticking time bomb.
The moment you get a network blip, a server reboot, or a simple session timeout, the connection breaks. Your entire data stream grinds to a halt until someone notices and manually intervenes. This is where we stop thinking about a simple command and start engineering a resilient, self-healing service.
The goal is to build something that not only establishes the tunnel but, more critically, watches it like a hawk and restarts it the second it fails. This is how you transform change data capture with SSH tunnels and port forwarding from a brittle hack into a reliable piece of infrastructure. To get there, we’ll combine two battle-tested Linux utilities: autossh and systemd.
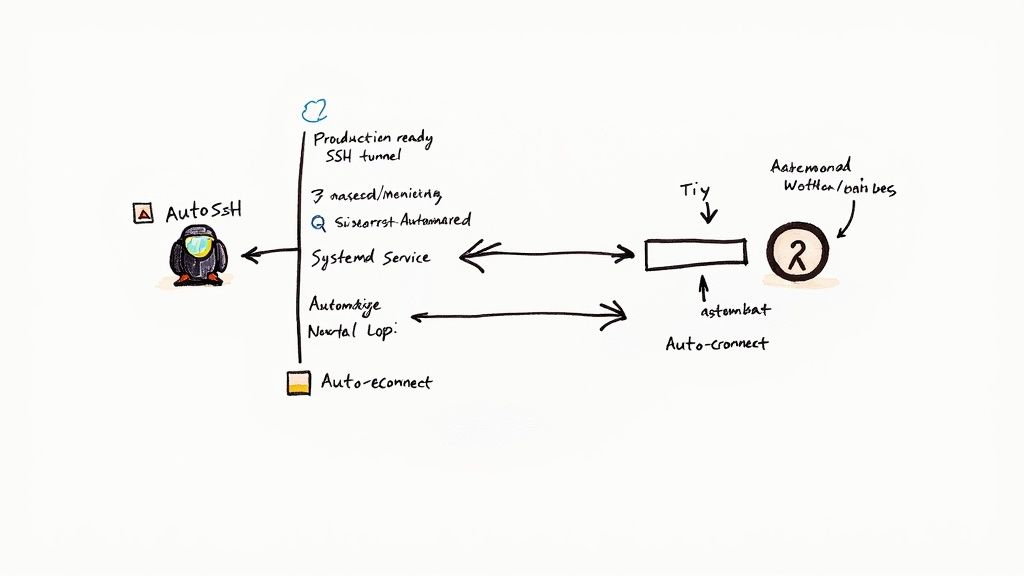
Introducing Autossh for Automatic Reconnections
Autossh is a small but mighty utility built for one job: starting an SSH session and keeping it alive. It wraps the standard ssh command, periodically sending test data through the tunnel to confirm it’s healthy. If that check fails or the SSH process dies, autossh immediately restarts it, re-establishing your port forward without anyone lifting a finger.
Think of it as a dedicated watchdog for your SSH connection. Here’s how you’d upgrade a standard local forwarding command into a more reliable autossh version:
autossh -M 0 -N -L 5433:private-db-host:5432 cdcuser@bastion.example.com
The key flag here is -M 0. This tells autossh to ditch its legacy port-monitoring method and instead rely on the built-in SSH ServerAliveInterval and ServerAliveCountMax mechanisms, which are far more reliable.
The rest of the command is exactly what you’d pass to ssh. Autossh just acts as a persistent manager for the process.
From Experience: Using autossh is the first and most important step toward a production-ready setup. It single-handedly solves the headache of dropped connections, giving your CDC pipeline the ability to recover from the inevitable transient network glitches.
Elevating Autossh with a Systemd Service
While running autossh from the command line is a huge improvement, it still has a glaring weakness: it won’t survive a server reboot. To create a truly hands-off, production-grade tunnel, we need to hand over management of the autossh process to the system’s own service manager. On any modern Linux system, that means systemd.
Wrapping autossh in a systemd service guarantees that your tunnel:
- Starts automatically the moment the server boots.
- Is managed by the OS, which handles logging and can restart the
autosshprocess itself if it somehow crashes. - Can be controlled using standard, familiar commands like
systemctl start,systemctl stop, andsystemctl status.
This approach formalizes the tunnel as a core piece of your server’s infrastructure, just like any other critical daemon.
Crafting the Systemd Unit File
Creating a systemd service is as simple as writing a configuration file, known as a unit file. You’ll place this in /etc/systemd/system/, naming it something descriptive like cdc-tunnel.service.
Here’s a complete, annotated template you can adapt for your own use. This example sets up a local forward for a PostgreSQL database.
[Unit]Description=CDC SSH Tunnel for PostgreSQL DatabaseAfter=network.target
[Service]User=cdc-tunnel-user
The full autossh command
ExecStart=/usr/bin/autossh -M 0 -o “ServerAliveInterval=30” -o “ServerAliveCountMax=3” -N -L 5433:private-db-host:5432 cdcuser@bastion.example.com -i /home/cdc-tunnel-user/.ssh/id_rsa
Restart the service if it ever fails
Restart=alwaysRestartSec=10
Set a timeout for stopping the service
TimeoutStopSec=60
[Install]WantedBy=multi-user.target
Let’s quickly walk through the important parts of this file:
-
[Unit]Section -
Description: A human-readable name for your service that shows up in logs and status checks. -
After=network.target: A critical dependency that tellssystemdnot to even think about starting this service until the network is fully up and running. -
[Service]SectionUser: Runs the service as a dedicated, non-privileged user (cdc-tunnel-user) instead of root—a basic but essential security practice.ExecStart: This is the heart of the service. It defines the exactautosshcommand to run. Notice we’ve added SSH keep-alive options and specified a dedicated SSH key with-i.Restart=always: This is the magic bullet. It instructssystemdto automatically restart the service if it stops for any reason.RestartSec=10: Prevents a frantic loop of failures by waiting 10 seconds before trying to restart.
-
[Install]SectionWantedBy=multi-user.target: This hooks the service into the system’s boot process, ensuring it starts automatically.
Once that file is saved, you can bring your resilient tunnel to life with a few standard commands:
Tell systemd to read the new service file
sudo systemctl daemon-reload
Enable the service to start automatically on every boot
sudo systemctl enable cdc-tunnel.service
Start the service right now
sudo systemctl start cdc-tunnel.service
And finally, check its status to make sure it’s running
sudo systemctl status cdc-tunnel.service
By combining autossh with systemd, you’ve now built a resilient, self-healing, and fully automated tunnel. This setup is ready to reliably support your mission-critical CDC pipelines, ensuring data flows continuously, even when the network gets choppy.
Essential Security Practices for SSH Tunneling
An SSH tunnel gives you a powerful, encrypted channel, but if you’re not careful, it can also become a gaping security hole. When you’re building a change data capture pipeline with SSH tunnels and port forwarding, getting the connection to work is only half the battle. The real challenge is making sure that connection doesn’t become your network’s weakest link. Locking down your tunneling setup isn’t just a good idea; it’s a non-negotiable step for any production system.
The guiding principle here is always least privilege. Every single piece of the puzzle—from the service account to the SSH key itself—should have the absolute minimum permissions needed to do its job, and nothing more. A tunnel configured to only forward traffic to a single database port is infinitely safer than one using a key that also grants shell access.
Restrict Access with Dedicated Keys and Users
Your first line of defense is simple: get rid of shared credentials and password-based logins. Every automated tunnel needs its own dedicated, unprivileged service account on the bastion host.
- Mandate Public Key Authentication: This one is non-negotiable. Turn off password authentication on your bastion host entirely. In your
/etc/ssh/sshd_configfile, make surePasswordAuthentication nois set. This single change shuts down the risk of brute-force password attacks. - Create a Dedicated Service Account: Spin up a unique, non-privileged user for each tunnel. This user shouldn’t even have a valid shell. By setting the user’s shell to
/sbin/nologinor/usr/sbin/nologin, you ensure that even if someone compromises the key, they can’t get an interactive session. - Use Unique SSH Keys for Each Tunnel: Don’t get lazy and reuse keys. Every tunnel gets its own unique, password-protected SSH key pair. This approach is granular for a reason. If one key is ever compromised, the blast radius is contained to that single connection, not your entire infrastructure.
This layered approach to user and key management is fundamental. Remember, security is an end-to-end concern. While you’re tightening up your SSH configuration, don’t forget the bigger picture. Things like addressing critical security vulnerabilities in network devices are just as important for a solid defense-in-depth strategy.
Lock Down Keys with authorized_keys
Now for the real power move. The authorized_keys file on your bastion host is where you can turn a general-purpose SSH key into a highly specialized, single-purpose tool. This is where you enforce incredibly granular restrictions on a per-key basis.
You can do this by adding special options right before the public key entry.
command=“/bin/echo ‘This key is for port forwarding only.’; exit 1”,no-port-forwarding,no-X11-forwarding,no-agent-forwarding,no-pty ssh-rsa AAAA…Let’s unpack the most important options you’ll use:
command="...": This is your ultimate lockdown tool. It forces the key to run one specific command on login and nothing else. For port forwarding, a great trick is to use a command that just prints a message and exits, which denies shell access but still allows the tunnel to form.no-port-forwarding: This sounds backward, but you use it to kill all forwarding capabilities except for what you specifically allow next.permitopen="host:port": Here’s the magic. This option restricts the key to only forwarding traffic to one specific host and port, likepermitopen="private-db-host:5432".no-pty: This one prevents the allocation of a terminal, adding another layer of hardening against interactive sessions.
By chaining these options together, you can forge an authorized_keys entry where a specific key can only forward traffic to your database on port 5432. It can’t do anything else. This is the principle of least privilege in action.
Harden the Network Layer
Finally, don’t stop at the SSH service itself. The bastion host needs to be a fortress. Use a firewall (like ufw or iptables on Linux) to enforce strict rules for incoming and outgoing traffic.
Ideally, the bastion should only accept SSH connections from a very small, known list of IP addresses, like the static IPs of your CDC platform. Every other port should be locked down by default.
This combination of user-level restrictions, key-specific permissions, and network-level hardening creates a deep, layered defense. It’s how you build data pipelines that are not just functional, but truly secure. If you want to dive deeper into enterprise-grade security and compliance, you can see how we approach it by exploring the security measures at Streamkap.
Troubleshooting Common CDC Tunnel Issues
Sooner or later, even the most carefully built tunnel is going to give you trouble. When your CDC pipeline grinds to a halt, the natural instinct is to panic. But a calm, methodical approach will get things flowing again much faster. The key is knowing where to look and what to look for when your change data capture pipeline with SSH tunnels and port forwarding goes dark.
Most problems boil down to two scenarios: either the tunnel itself won’t connect, or it connects just fine but no data is actually moving. Before we get into the weeds, it’s worth remembering that every SSH tunnel adds a tiny bit of latency from the extra network hop and a little CPU overhead for encryption. Modern CPUs barely notice this, but it’s still smart to keep an eye on CPU usage on your bastion host, especially when things get busy.
Is the Tunnel Even Running?
Before you start a deep-dive investigation, your very first step should be to see if the tunnel process is actually alive. This one check can save you hours of chasing ghosts.
If you kicked off the tunnel with a manual ssh or autossh command, a simple ps command will tell you what you need to know.
ps aux | grep ssh
Scan the output for the exact port forwarding command you ran. If you don’t see it, it either failed to start or crashed sometime after.
For tunnels you’ve properly set up as a systemd service, the process is even cleaner and gives you way more information.
sudo systemctl status cdc-tunnel.service
This command immediately tells you if the service is active, spits out the latest log entries, and highlights any errors or exit codes. Honestly, this is usually the quickest path to figuring out why a tunnel isn’t starting up.
Dealing with “Connection Refused”
Ah, the “Connection refused” error. It’s probably the most common and frustrating issue you’ll face. It means your SSH client successfully reached the server, but the server slammed the door on the port you tried to use.
This almost always points to one of a few usual suspects:
- Firewall Rules: This is the number one cause. A firewall on the bastion host, some router in between, or a cloud security group is blocking traffic on port 22.
- SSH Service Is Down: It’s possible the
sshddaemon on the bastion host just isn’t running. A quicksudo systemctl status sshdwill confirm. - Wrong Host or Port: We’ve all done it. A simple typo in the hostname or port in your SSH command is sending you to the wrong place. Double-check everything.
To get to the bottom of it, a great next step is to check the SSH server’s authentication logs. On most systems, you’ll find them in /var/log/auth.log. This file is a goldmine, recording every successful and failed login attempt, often with clear reasons for why a connection was denied.
My Pro Tip: When you’re stuck on a connection issue, always work your way up from the network. Check firewalls and service status on the remote end before you start tearing apart your local command and configuration.
The Tunnel is Up, But Data Isn’t Flowing
Then there’s the other big headache. The tunnel connects successfully—systemctl status is green, ps shows the running process—but your CDC connector is acting like the database doesn’t exist. This tells you the tunnel is established, but the traffic isn’t being routed or handled correctly at the other end.
A classic mistake, especially with reverse tunnels, is getting tripped up by the GatewayPorts setting in the bastion host’s /etc/ssh/sshd_config file. By default, SSH often binds the forwarded port only to the server’s loopback address (localhost). This means only services running on that same server can reach it. By changing this to GatewayPorts yes, the port binds to 0.0.0.0, making it accessible to other machines, like a separate Kafka Connect cluster trying to reach the tunnel.
Another common blunder is simply misconfiguring the CDC tool itself. Make sure the hostname in your Debezium or Streamkap connector is set to localhost and the port matches the local port from your ssh -L command—not the database’s real port on the other side of the tunnel.
Frequently Asked Questions
When you’re threading CDC traffic through SSH tunnels, a few common questions always pop up around performance, database support, and security. Let’s tackle them head-on, because getting these details right is key to building a solid data pipeline.
What’s the Real Performance Hit of Using an SSH Tunnel for CDC?
Let’s be direct: there is a performance cost, but it’s almost always negligible. You’re adding an extra network hop through the bastion host, which introduces a tiny bit of latency. Unless your servers are on opposite sides of the globe, you likely won’t even notice it.
The other factor is encryption. SSH has to encrypt and decrypt the data, which takes CPU cycles. Thankfully, modern processors are built for this with hardware acceleration for AES. For the vast majority of CDC workloads, the security you gain is well worth the tiny performance trade-off. Just keep an eye on the CPU usage of your bastion host if you’re pushing a truly massive volume of data.
Can I Really Use This Method for Any Database?
Yes, you absolutely can. The beauty of SSH port forwarding is that it’s completely database-agnostic. It works at the network’s TCP layer, which means it doesn’t care what kind of database traffic is flowing through the tunnel.
As long as your CDC tool can connect to your database over a standard TCP connection, you’re good to go. This approach works flawlessly for:
The only thing you’ll need to change is the port you’re forwarding (like 1433 for SQL Server) and, of course, the connection string in your CDC connector’s settings.
Is a Bastion Host Really Necessary?
In any production environment? Yes. While you could technically open an SSH port on your database server directly to the internet, you’d be creating a massive, unnecessary security hole. Don’t do it.
Think of a bastion host as your fortified gatehouse. It’s a single, hardened point of entry that you can monitor and lock down tightly. This approach shrinks your attack surface dramatically and is a cornerstone of any serious defense-in-depth security strategy.
Ready to build resilient, real-time data pipelines without the operational overhead? Streamkap provides a managed platform for Change Data Capture, powered by Apache Kafka and Flink, to stream data from any source to any destination. Let us handle the complexity so you can focus on insights. Learn more about how Streamkap can simplify your data architecture today.